Boost Your Skills Online: Smashing Workshops On Front-End And Design

How do we build and establish a successful design system? What about modern CSS and JavaScript? What’s the state of HTML Email? And what are new, smart design patterns we could use? What will it take us to move to TypeScript or Vue.js? With our online workshops, we try to answer these questions well.

Our workshops bring in knowledgeable, kind folks from the community to explore real-life solutions to real-life problems, live, with you. All sessions are broken down into 2.5h-segments across days, so you always have time to ask questions, share your screen and get immediate feedback. Jump to all workshops.

Meet Smashing Online Workshops: live, interactive sessions on front-end & UX.

In fact, live discussions and interactive exercises are at the very heart of every workshop, with group work, homework, reviews and live interaction with people around the world. Plus, you get all video recordings of all sessions, so you can re-watch at any time, in your comfy chair in familiar comfort of your workspace.

Upcoming Workshops (May-September 2021)

No pre-recorded sessions, no big picture talks. Our workshops take place live and span multiple days. They are split into 2.5h-sessions, plus you’ll get all workshop video recordings, slides and a friendly Q&A in every session.

We also have friendly bundles for larger teams and agencies.

Workshops in May–July

Meet our friendly front-end & UX workshops. Boost your skills online and learn from experts — live.

Workshops in August–September

What Are Online Workshops Like?

Do you experience Zoom fatigue as well? After all, who really wants to spend more time in front of their screen? That’s exactly why we’ve designed the online workshop experience from scratch, accounting for the time needed to take in all the content, understand it and have enough time to ask just the right questions.

In our workshops, everybody is just a slightly blurry rectangle on the screen; everybody is equal, and invited to participate.

Our online workshops take place live and span multiple days across weeks. They are split into 2.5h-sessions, and in every session there is always enough time to bring up your questions or just get a cup of tea. We don’t rush through the content, but instead try to create a welcoming, friendly and inclusive environment for everyone to have time to think, discuss and get feedback.

There are plenty of things to expect from a Smashing workshop, but the most important one is focus on practical examples and techniques. The workshops aren’t talks; they are interactive, with live conversations with attendees, sometimes with challenges, homework and team work.

Of course, you get all workshop materials and video recordings as well, so if you miss a session you can re-watch it the same day.

TL;DR

  • Workshops span multiple days, split in 2.5h-sessions.
  • Enough time for live Q&A every day.
  • Dozens of practical examples and techniques.
  • You’ll get all workshop materials & recordings.
  • All workshops are focused on front-end & UX.
  • Get a workshop bundle and save $250 off the price.

Thank You!

We hope that the insights from the workshops will help you improve your skills and the quality of your work. A sincere thank you for your kind, ongoing support and generosity — for being smashing, now and ever. We’d be honored to welcome you.

How To Implement Authentication In Next.js With Auth0

“Authentication” is the action of validating that a user is who he or she claims to be. We usually do this by implementing a credentials system, like user/password, security questions, or even facial recognition.

“Authorization” determines what a user can (or can’t) do. If we need to handle authentication and authorization in our web application, we will need a security platform or module. We can develop our own platform, implement it, and maintain it. Or we can take the advantage of existing authentication and authorization platforms in the market that are offered as services.

When evaluating whether it’s better for us to create our own platform, or to use a third-party service, there are some things that we should consider:

  • Designing and creating authentication services is not our core skill. There are people working specially focused on security topics that can create better and more secure platforms than us;
  • We can save time relying on an existing authentication platform and spend it adding value to the products and services that we care about;
  • We don’t store sensitive information in our databases. We separate it from all the data involved in our apps;
  • The tools third-party services offer have improved usability and performance, which makes it easier for us to administrate the users of our application.

Considering these factors, we can say that relying on third-party authentication platforms can be easier, cheaper, and even more secure than creating our own security module.

In this article, we will see how to implement authentication and authorization in our Next.js applications using one of the existing products in the market: Auth0.

What Is Auth0?

It allows you to add security to apps developed using any programming language or technology.

“Auth0 is a flexible, drop-in solution to add authentication and authorization services to your applications.”

Dan Arias, auth0.com

Auth0 has several interesting features, such as:

  • Single Sign-On: Once you log into an application that uses Auth0, you won’t have to enter your credentials again when entering another one that also uses it. You will be automatically logged in to all of them;
  • Social login: Authenticate using your preferred social network profile;
  • Multi-Factor Authentication;
  • Multiple standard protocols are allowed, such as OpenID Connect, JSON Web Token, or OAuth 2.0;
  • Reporting and analytics tools.

There is a free plan that you can use to start securing your web applications, covering up to 7000 monthly active users. You will start paying when the amount of users increases.

Another cool thing about Auth0 is that we have a Next.js SDK available to use in our app. With this library, created especially for Next.js, we can easily connect to the Auth0 API.

Auth0 SDK For Next.js

As we mentioned before, Auth0 created (and maintains) a Next.js focused SDK, among other SDKs available to connect to the API using various programming languages. We just need to download the NPM package, configure some details about our Auth0 account and connection, and we are good to go.

This SDK gives us tools to implement authentication and authorization with both client-side and server-side methods, using API Routes on the backend and React Context with React Hooks on the frontend.

Let’s see how some of them work in an example Next.js application.

Example Next.js App Using Auth0

Let’s go back to our previous video platform example, and create a small app to show how to use Auth0 Next.js SDK. We will set up Auth0’s Universal Login. We will have some YouTube video URLs. They will be hidden under an authentication platform. Only registered users will be able to see the list of videos through our web application.

Note: This article focuses on the configuration and use of Auth0 in your Next.js application. We won’t get into details like CSS styling or database usage. If you want to see the complete code of the example app, you can go to this GitHub repository.

Create Auth0 Account And Configure App Details

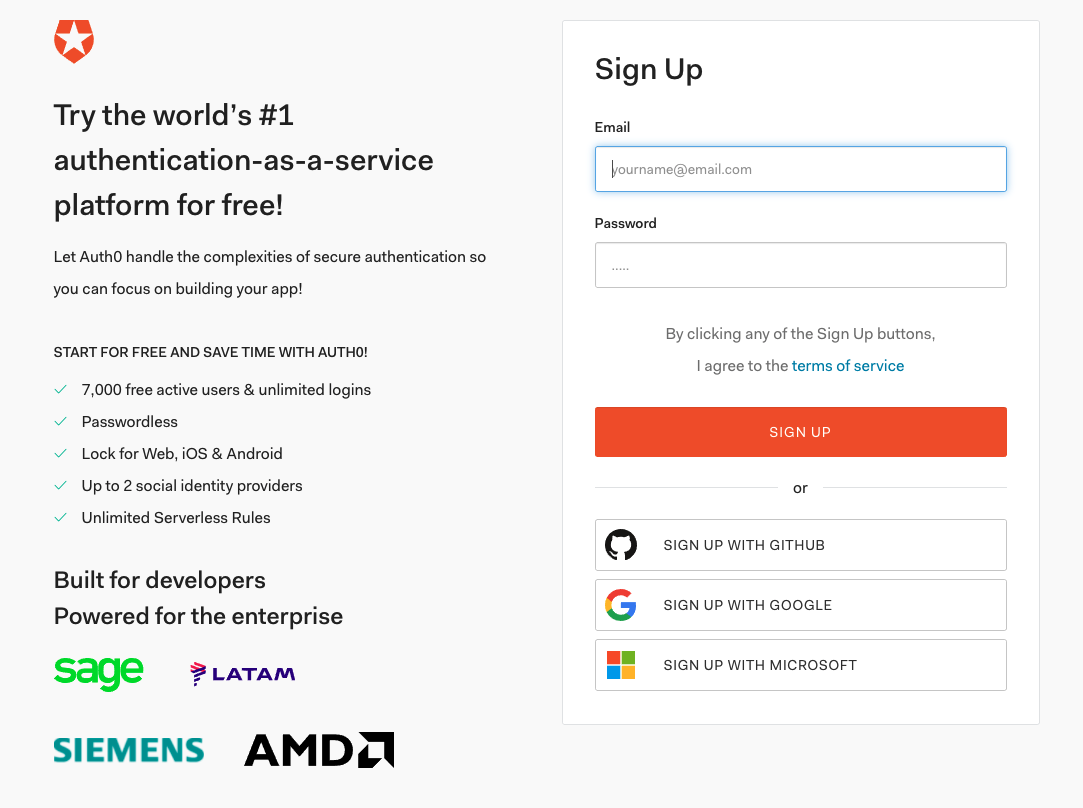
First of all, we need to create an Auth0 account using the Sign Up page.

After that, let’s go to the Auth0 Dashboard. Go to Applications and create a new app of type ["Regular Web Applications"].

Now let’s go to the Settings tab of the application and, under the Application URIs section, configure the following details and save the changes:

  • Allowed Callback URLs: add http://localhost:3000/api/auth/callback
  • Allowed Logout URLs: add http://localhost:3000/

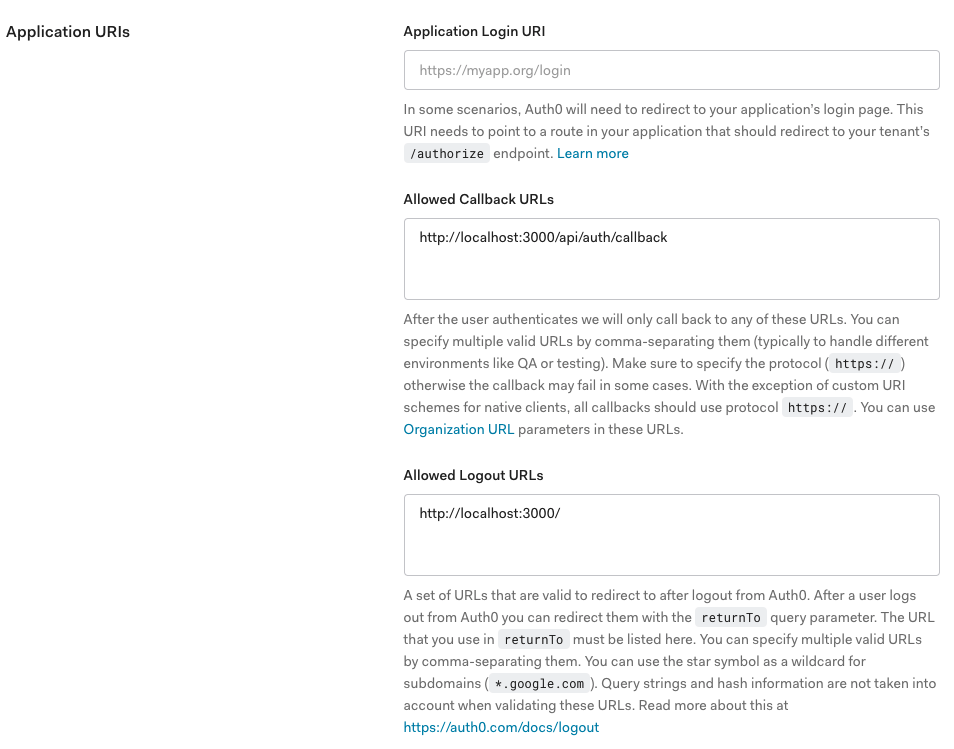
By doing this, we are configuring the URL where we want to redirect the users after they login our site (Callback), and the URL where we redirect the users after they log out (Logout). We should add the production URLs when we deploy the final version of our app to the hosting server.

Auth0 Dashboard has many configurations and customizations we can apply to our projects. We can change the type of authentication we use, the login/sign-up page, the data we request for the users, enable/disable new registrations, configure users' databases, and so on.

Create Next.js App

To create a brand new Next.js app, we will use create-next-app, which sets up everything automatically for you. To create the project, run:

npx create-next-app [name-of-the-app]

Or

yarn create next-app [name-of-the-app]

To start the develop server locally and see the site just created in your browser, go to the new folder that you created:

cd [name-of-the-app]

And run:

npm run dev

Or

yarn dev

Install And Configure The Auth0 Next.js SDK

Let’s install the Auth0 Next.js SDK in our app:

npm install @auth0/nextjs-auth0

Or

yarn add @auth0/nextjs-auth0

Now, in our env.local file (or the environment variables menu of our hosting platform), let’s add these variables:

AUTH0_SECRET="[A 32 characters secret used to encrypt the cookies]"
AUTH0_BASE_URL="http://localhost:3000"
AUTH0_ISSUER_BASE_URL="https://[Your tenant domain. Can be found in the Auth0 dashboard under settings]"
AUTH0_CLIENT_ID="[Can be found in the Auth0 dashboard under settings]"
AUTH0_CLIENT_SECRET="[Can be found in the Auth0 dashboard under settings]"

If you want more configuration options, you can take a look at the docs.

Create the Dynamic API Route

Next.js offers a way to create serverless APIs: API Routes. With this feature, we can create code that will be executed in every user request to our routes. We can define fixed routes, like /api/index.js. But we can also have dynamic API routes, with params that we can use in our API routes code, like /api/blog/[postId].js.

Let’s create the file /pages/api/auth/[...auth0].js, which will be a dynamic API route. Inside of the file, let’s import the handleAuth method from the Auth0 SDK, and export the result:

import { handleAuth } from '@auth0/nextjs-auth0';

export default handleAuth();

This will create and handle the following routes:

  • /api/auth/login
    To perform login or sign up with Auth0.
  • /api/auth/logout
    To log the user out.
  • /api/auth/callback
    To redirect the user after a successful login.
  • /api/auth/me
    To get the user profile information.

And that would be the server-side part of our app. If we want to log in to our application or sign up for a new account, we should visit http://localhost:3000/api/auth/login. We should add a link to that route in our app. Same for logging out from our site: Add a link to http://localhost:3000/api/auth/logout.

Add The UserProvider Component

To handle user authentication state on the frontend of our web application we can use UserProvider React component, available on Auth0 Next.js SDK. the component uses React Context internally.

If you want to access the user authentication state on a Component, you should wrap it with a UserProvider component.

<UserProvider>
  <Component {...props} />
</UserProvider>

If we want to access all of the pages in our application, we should add the component to the pages/_app.js file. pages/_app.js overrides the React App component. It’s a feature that Next.js exposes to customize our application. You can read more about it here.

import React from 'react';
import { UserProvider } from '@auth0/nextjs-auth0';

export default function App({ Component, pageProps }) {
  return (
    <UserProvider>
      <Component {...pageProps} />
    </UserProvider>
  );
}

We have a React hook useUser that accesses to the authentication state exposed by UserProvider. We can use it, for instance, to create a kind of welcome page. Let’s change the code of the pages/index.js file:

import { useUser } from "@auth0/nextjs-auth0";

export default () => {
 const { user, error, isLoading } = useUser();

 if (isLoading) return <div>Loading...</div>;

 if (error) return <div>{error.message}</div>;

 if (user) {
   return (
     <div>
       <h2>{user.name}</h2>
       <p>{user.email}</p>
       <a href="/api/auth/logout">Logout</a>
     </div>
   );
 }
 return <a href="/api/auth/login">Login</a>;
};

The user object contains information related to the user’s identity. If the person visiting the page is not logged in (we don’t have a user object available), we will display a link to the login page. If the user is already authenticated, we will display user.name and user.email properties on the page, and a Logout link.

Let’s create a videos.js file, with a list of three YouTube video URLs that will only be visible for registered people. To only allow logged users to see this page, we will use withPageAuthRequired method from the SDK.

import { withPageAuthRequired } from "@auth0/nextjs-auth0";

export default () => {
 return (
   <div>
     <a href="https://www.youtube.com/watch?v=5qap5aO4i9A">LoFi Music</a>
     <a href="https://www.youtube.com/watch?v=fEvM-OUbaKs">Jazz Music</a>
     <a href="https://www.youtube.com/watch?v=XULUBg_ZcAU">Piano Music</a>
   </div>
 );
};

export const getServerSideProps = withPageAuthRequired();

Take into consideration that our web application allows any person to sign up for an account, using the Auth0 platform. The user can also re-use an existing Auth0 account, as we’re implementing Universal Login.

We can create our own registration page to request more details about the user or add payment information to bill them monthly for our service. We can also use the methods exposed in the SDK to handle authorization in an automatic way.

Conclusion

In this article, we saw how to secure our Next.js applications using Auth0, an authentication and authorization platform. We evaluate the benefits of using a third-party service for the authentication of our web applications compared to creating our own security platform. We created an example Next.js app and we secured it using Auth0 free plan and Auth0 Next.js SDK.

If you want to deploy an Auth0 example application to Vercel, you can do it here.

Further Reading And Resources

Optimizing WPBakery’s Impreza Theme With Smush And Hummingbird Plugins

Impreza is a popular WPBakery-based theme with a flavor all of its own. In this post, a WPMU DEV member shares how to optimize this multipurpose WordPress theme for top speed and best performance.

As Phil Martin, WPMU DEV member, web developer, and owner of Canadian-based web design company CapitalWebDesign.ca recently shared with us, “there is a lot of interest in optimizing WPBakery-based themes these days, so I thought I’d provide my 2¢ on the WPBakery-powered theme I have been using lately, Impreza.”

WordPress Impreza Theme
Impreza is a multi-purpose WordPress theme that uses WPBakery.

In this post, we’ll cover the following:

Overview of Impreza Theme for WordPress

Impreza is a premium WordPress theme that uses WPBakery. It was developed and maintained by UpSolution and is currently available from ThemeForest, where it ranks as one of their best-selling themes with over 80,000 sales to date and a 4.89/5 star rating from over 2,200 user reviews.

Best-selling WordPress themes on ThemeForest
Impreza is one of the top-selling WordPress themes on ThemeForest.

The theme’s license normally costs $59 but often goes on sale for $39 and comes with 12 months of support.

As Phil states: “They push big updates every month on average. Seriously, check out this changelog and try to convince me that isn’t the best changelog layout/styling you’ve seen in a long time.”

The Impreza theme uses WPBakery but with their own flavor thrown in. It’s an incredibly modular theme that decouples many of the structural components, including:

  • Grid layouts: Impreza lets you customize how you display groups of data such as posts, custom post types like testimonials or products, image galleries, etc. You can effectively customize any element in a grid. Check out their grid layout doc page for a glimpse.
  • Page blocks: The theme provides reusable blocks. This lets you edit everything in one place and the changes are then reflected everywhere you have added the block. Use these for footers, call to actions, etc.
  • Page templates: You can build a template using WPBakery that can be applied to any post type or page. Use these to have different footers for posts versus pages or to support a different template based on the post type (e.g. a cooking recipe vs a product review in a blog).
  • Header builder: Impreza provides a unique, powerful, and very intuitive header builder. Check out the header builder doc page.
Impreza Grid Layout
Impreza lets you effectively customize any element in a grid.

Some additional points to note about Impreza:

  • It natively supports most of the ACF custom fields (doubly great if you use our SmartCrawl plugin for SEO, which also supports ACF).
  • 100% compatible with WPML language translation plugin.
  • Built-in performance optimization options (including a one-click asset optimization for WPBakery elements: only include CSS + JS for elements that exist on your pages)
  • Built-in maintenance mode, button builder, custom image sizes among others
  • Ability to import individual demo pages or copy in specific rows from specific demo pages. This is a great quality of life option: when you see a specific row in a demo that you’d like to replicate, just copy + paste.
  • Each license is valid for 1 production site and 1 development site (forces maintenance mode). A licensed site provides you with theme white label, demo import, one-click theme updates (without Envato Plugin), addons/recommended plugins (e.g. Smush)
  • Note: Running a license per site is not necessary and you can rotate a license where you need to install addons or import demos. Theme updates are still available through Envato Plugin for unlicensed sites, too. Also, while your support is active, the theme developers will help you with pretty much any theme customization and, according to Phil who uses the theme extensively, their support staff are incredibly knowledgeable.

So, Impreza is a great WordPress theme to use, especially if you love using WPBakery.

What we really want to know, however, is this:

  • Do sites created with Impreza load fast and perform well?
  • Can we make sites created with Impreza load even faster and perform even better using our optimization plugins Smush and Hummingbird and managed WordPress hosting?

For these answers, let’s turn to Phil’s…

Testing Methodology for Optimizing the Impreza WordPress Theme

Impreza is very performance-oriented, as evidenced by some of the advanced theme options they provide.

Impreza - Advanced Theme Options.
Impreza offers advanced theme options to help improve performance.

To see how well Impreza can be made to rank on Google PageSpeed Insights and GTmetrix, here is Phil’s testing methodology in his own words:

(Editor’s Note: WPMU DEV members like Phil get access to the Pro versions of our plugins automatically as part of their WPMU DEV membership but you can follow the same methodology shown below using the free versions of Smush and Hummingbird.)

  • Use a real website: The website I used in this benchmark is a real, fully-built website. Although it’s not yet live to public traffic, it’s running WPML and is full of real content including images.
  • Hosted on WPMU DEV: A simple bronze-level server located in Toronto, Canada. We’ll be testing FastCGI serverside caching
  • Smush Pro: Image optimization is important to this site as every blog post has a featured image. This website is likely to grow to 10,000+ blog posts over the next 5 years, so we need to make sure we optimize from the start.
  • Hummingbird Pro: Test to see if asset optimization works with Impreza.
  • Caching: We don’t need redundancy in caching solutions, so either Hummingbird Pro caching or serverside FastCGI caching was used.
  • Impreza performance settings: keep “http/https” in the paths to files, disable jQuery migrate script, move jQuery scripts to the footer, dynamically load theme JS components, disable extra features of WPBakery Page Builder, disable Gutenberg (block editor) CSS files, optimize JS and CSS size, and merge Google Fonts styles into single CSS file.

Benchmark Results

Tests were performed by starting with both plugins disabled, Impreza performance settings off, and serverside cache disabled.

Phil then incrementally enabled one component at a time. Google PageSpeed Insights was run three times (average of three runs kept) and a GTmetrix performance report was generated.

Here are Phil’s test results:

Impreza Theme- Test Results
The above tests were run independently by Phil Martin, a professional WordPress website developer and a WPMU DEV member. Phil’s test results with Impreza theme and incremental optimization methods.

As you can see from the above, Phil’s test results went from…

Before (Impreza only):

  • Google PSI mobile score: 27
  • Google PSI desktop score: 83
  • GTmetrix score: A – 92%-94%
  • GTmetrix *FCP: 1.1s
  • GTmetrix **TTFB: 0.8s

After (Impreza + Smush + Hummingbird + CDN/Caching):

  • Google PSI mobile score: 87 (222% improvement)
  • Google PSI desktop score: 96 (15.6% improvement)
  • GTmetrix score: A – 100%-95%
  • GTmetrix *FCP: 0.461s
  • GTmetrix **TTFB: 0.206s

* FCP = First Contentful Paint
** TTFB = Time To First Byte

After running the above tests, here is the setup that Phil found to perform the best:

  • Impreza performance settings: ALL enabled.
  • Smush: ALL recommended + CDN + WebP (Pro-only features). Additionally, make sure the WPBakery Page Builder integration is enabled in the Smush > Integrations menu. This will smush custom-sized images resized using WPBakery’s Page Builder editor.
  • Hummingbird: ALL recommended + CDN + Asset Optimization Automatic/Speedy.
  • Caching: EITHER Hummingbird Pro or serverside FastCGI.
  • Impreza + WPMU DEV hosting on their own still do a good job out of the box. 83/100 on PageSpeed Desktop and an A grade (92%; 94%) on GTmetrix is impressive, but obviously the 27 score on Mobile is not desirable.
  • Impreza’s built-in performance optimizations is very effective. It improves both Google PageSpeed scores into the 90s, which is especially important for Mobile.
  • Smush doesn’t appear to make much of a difference to performance scores, but it will reduce your overall page load size where images are present.
  • Hummingbird cache appears to be on-par to FastCGI serverside cache.
  • Hummingbird Pro CDN appears to be on-par with letting the server provide CSS + JS via FastCGI caching.

Here are some additional valuable insights that Phil provided after running the tests:

  • “The #1 thing that completely ruins these scores is Google’s reCAPTCHA javascript.”
  • “I am honestly surprised at how well the theme + WPMU DEV Hosting w/ FastCGI serverside caching performed. TTFB of 0.224s and 92/98 on PageSpeed Insights without additional plugins is incredibly impressive. Smush Pro is then an extra layer of optimization on top by serving super-optimized image files. Hummingbird Pro can relax a bit and not have to worry about serving cache. Rather, it can focus on setting all our expiry headers, monitoring uptime and serving CSS/JS from CDN.”

Optimize Impreza with Smush and Hummingbird and you can have your cake and eat it too!

Making Impreza’s Performance Even More Imprezive

In Phil’s own words:

“Having used many of the top ranking multipurpose themes in the past (Avada, Enfold, Etalon, Extra, Jupiter, Salient, etc.) I have never had as much success building modern, minimalist, efficient and hyper-performing websites as I have with Impreza. Trading pre-built template and demo libraries for thoughtful design, extensive customizability and ridiculous performance is worth it to me.

And look, the results don’t lie: not a single test dropped out of the A grade on GTmetrix.”

Impreza theme - performance results.
You don’t need to be a Canadian like Phil to get all “A”s – just install Smush and Hummingbird… WPMU DEV’s “moose’t-have” optimization plugins.

So, there you have it!

Impreza is not only a fast-loading WordPress multi purpose theme powered by the WPBakery page builder but its performance can be improved using Smush and Hummingbird optimization plugins with serverside hosting features like CDN and FastCGI enabled.

To access our entire suite of Pro plugins, blazing-fast managed WordPress hosting, and expert 24×7 help and support for all things WordPress, become a WPMU DEV member today with our 7-day free membership trial.

Contributors

This article was written in collaboration with:

Capital Web Design - Ottawa Web Design

Phil Martin –  Capital Web Design.  Phil uses his twenty years of web design experience to achieve one goal: give back to his hometown by building modern websites for businesses and nonprofits in the Canadian capital!

***

Note: We do not accept articles from external sources. WPMU DEV members, however, may contribute ideas and suggestions for tutorials and articles on our blog via the Blog XChange.