Install Your First WordPress Theme

This guest post is by Karol K of ThemeFuse.

Seeing a headline like “How to Install a WordPress Theme” on ProBlogger might seem strange at first. This doesn’t sound like a “pro”-thing at all, right? If you’ve been dealing with WordPress for a while then this is probably even more than obvious to you.

However, everyone starts somewhere, and there are plenty of experienced bloggers who haven’t ever installed a WordPress theme—but would like to give it a try. Maybe you’re installing your first theme right now, and you’re searching for a quick guide on how to do it.

Where can you get a good WordPress theme?

This is tricky. You see, when you’re installing a plugin the best place to go is the official directory at wordpress.org. When you’re installing a theme, however, the official theme directory is not the best place to go, I’m afraid.

Of course, you can find some interesting themes there, but you’re more likely to make your search much more fruitful if you just go to Google.

The thing with the official directory is that it only contains 1,490 themes or so. This is by no means the total number of themes available on the internet. There’s much much more interesting stuff out there, and settling for what you can find in the official directory would not be a wise thing to do.

Yesterday, I described how to select a theme that’s perfect for you and your blog. So here I will just assume that you already know which theme you want to use.

Step 1. Download the theme

Once you find a theme you like, you’ll need to download it to your computer before you can do anything else with it.

The package containing your theme can consist of many various elements. Depending on the license you’ve selected, you might find some PSD files, additional bonuses, documents, and so on. Of course, the theme files themselves will be present as well. Most of the time, all the contents of a theme are delivered as a ZIP archive.

2. Extract the files

Next, you have to extract the archive somewhere—onto your desktop, for example. If the archive contains more elements than just the theme (like the bonuses I mentioned above), open the archive’s readme file to locate the main theme’s directory.

As an example, here’s what you’ll find inside a ThemeFuse theme archive:

Once you’ve successfully identified the main theme directory, you can proceed to the next step.

3. Upload the theme to your WordPress blog

This step will require FTP access to your hosting account, and a piece of FTP software. You can try FileZilla—it’s good, and it’s free.

The theme’s main directory is the one you’ll be uploading to your blog. Connect to your site via FTP (the FTP tool’s help documentation will explain how to do this if you’re not sure) and navigate to the wp-content/themes directory of your site. This is where you upload your theme’s main directory.

Here’s the default look of the directory when it contains only one theme—the default theme TwentyEleven:

The next step in the process takes place in your WordPress Admin panel.

4. Activate your new theme

Log in to your WordPress Admin panel using your Admin account details.

Installing new themes requires Admin access rights; it can’t be done through other types of accounts.

Go to Appearance > Themes, as shown here:

Your new theme should be visible among all the others. The only thing left for you to do now is activate it:

If everything goes well, your new theme will be marked as the Current Theme, and your blog will have an entirely new look.

5. All done!

This is where the guide ends. There’s nothing more for you to do now other than enjoy your new theme! Of course, you could make some final adjustments to make your blog look truly unique, for instance, adding branding elements such as your logo, pictures, and so on. Or, if you’re ready to install a WordPress plugin, we have a guide to that, too!

Have you installed a WordPress theme yet? Share your tips with us in the comments.

Karol K. is a 20-something year old web 2.0 entrepreneur from Poland and a writer at ThemeFuse.com, where he shares various WordPress advice. Currently, he’s working on a new e-book titled “WordPress Startup Guide – little known things worth doing when creating a WordPress site.” The e-book launches soon, and now the best part … it’s free. Also, don’t forget to visit ThemeFuse to get your hands on some premium WordPress themes.

The post Install Your First WordPress Theme appeared first on ProBlogger.

Install Your First WordPress Theme
https://problogger.com/install-your-first-wordpress-theme/
http://www.problogger.net/archives/category/blog-networks/feed/
Blog Networks – ProBlogger
Blog Tips to Help You Make Money Blogging – ProBlogger
https://problogger.com/wp-content/uploads/powerpress/problogger_podcast-891.jpg

Powered by WPeMatico

The Emotional Punch of a Child’s Lost Tooth

A little before Christmas last year, our five year old son Ewan lost his first tooth.

My wife noticed it being loose at first, and our son got super excited. One of his favourite shows is Paw Patrol, and there was an episode where one of the dogs – Chase – had a loose tooth.

Ewan kept imitating Chase, wobbling his tooth, rolling his tongue around it, and it was fun to watch.

However, we didn’t want it to come out while sleeping, so my wife did her magic and got it out.

Like every other kid, Ewan placed it under his pillow and had a huge smile the morning after, when he saw that the tooth fairy had been and left him money for his tooth.

He’s now the proud owner of a tiny gap in the centre of his bottom row of teeth, and keeps asking people if they want to see it.

There’s another tooth starting to get loose, so the adventure is about to begin again.

And it makes me just a little sad.

The Bittersweet Joy of Watching Your Kids Grow

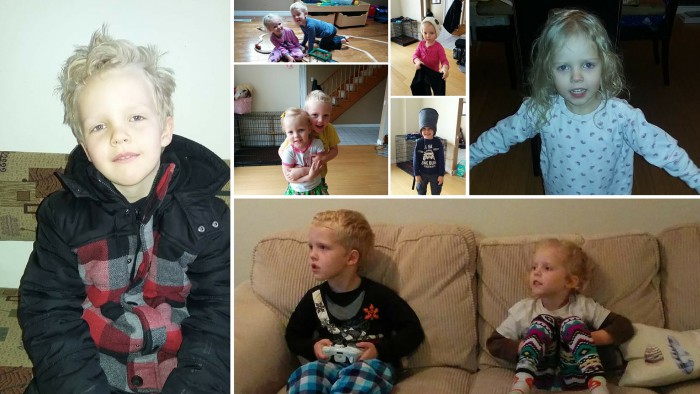
We have two kids. Ewan, who’s five, and our daughter Salem, who’ll turn four next week.

Sometimes it’s easy to forget that they’re growing up before our eyes. In many ways, they’re both still our babies. I guess they always will be.

I think that’s probably a natural parent thing, right? No matter how old your kids get, they’re always your babies.

Thinking back to when they actually were babies often seems like such a long time ago.

Ewan is in the final half of his senior kindergarten year, and begins Grade One after the summer.

Salem is in the final half of her daycare year, and starts junior kindergarten after the summer.

That seems like a big thing – knowing that both kids are now in school. Before I know it, it’ll be high school, then maybe college, then leaving home.

Sure, that’s still a good 10-15 years away minimum, but given how fast the last 4-6 years have passed since both kids came into our lives, 10-15 years doesn’t seem a long amount of time at all.

It’s a bittersweet feeling.

It’s amazing watching our kids grow into the people they are. They have awesome character traits, and you can see where our influence as parents begins and where Ewan and Salem’s own input begins.

Watching them play together, laugh together, read books together, etc., is an awesome experience, and one that makes me glow.

Ewan and Salem

But I also know at some stage, they’re probably going to be more independent from one another, and spend time with their friends from school, the neighbourhood, etc.

They’ll also do things for themselves that currently they need their parents for.

Even now, Ewan is more independent in this regard – things like brushing his teeth, grabbing snacks, choosing clothes to wear, etc.

There are a lot of things he, and his sister, still need us for – but it can only be a matter of time before that comes to an end, too.

We’re Always Parents Even When We’re Not

I was talking to a friend about this recently, and how you – as a parent – adapt to the changes as your kids grow up.

She has two teens, and her reply made a lot of sense.

Our kids are just going through the same things we did when we were younger, and we’re just going through the things they went through with us. It may feel like our kids are independent, and they may well be – but we’re always parents, even when we’re not.

Essentially, she was saying the obvious, but I liked the way she broke it down.

Our kids will grow. That’s how it should be. And they’ll depend on us, as parents, less and less. Again, that’s how it should be.

But that’s not to say they still don’t depend on us, or we’re no longer parents.

There will always be something they need. There will always be something we can offer, or help with.

Even if it’s just a phone call to complain about their lives, or to ask for a lift from a concert, or to ask why boys are stupid – there will always be a need for parent and child to be just that.

A first lost tooth may be a sign that your little boy is entering a new part of his life. It may also be the sign that the “little years” are coming to an end.

But you know what? In the grand scheme of things, that’s how it should be.

And that’s okay.

The Emotional Punch of a Child’s Lost Tooth originally appeared on Danny Brown – – all rights reserved.

Powered by WPeMatico

How to Improve Workflow in a Multi-Author WordPress Blog

This guest post is by Syed Balkhi of WPBeginner.

Running a multi-author blog can become a hassle, especially if you do not have a dedicated content manager for your site.Having run several multi-author blogs myself, I understand the issues you face and decisions you have to make.

If you’re running a multi-author blog, you may have asked yourself questions like, should I give the writer access to my WordPress dashboard? Is it secure? How do I monitor their activities to see they aren’t messing up my website? How do I improve my workflow?

In this article, I will share my personal experience in managing a collaborative WordPress site safely and effectively.

The “t” in “team” is also for “trust”

If you want to improve your workflow, then you will have to give your writers access to your WordPress dashboard. Otherwise, you will find yourself copying and pasting a lot of elements from a Word Document into your WordPress dashboard, attaching images, adding styling elements, and so on.

Fortunately, WordPress comes with numerous user roles with various permission levels.

user capability

If you look at the charts above, the two permission levels that make the most sense for multi-author blogs are Contributor and Author.

The biggest issue with Contributors is that they can’t attach images because they do not have the ability to upload files. Since you want your authors to have the ability to upload and attach images to their articles, you will want to give them Author-level permissions.

The big issue with that is that it gives them the ability to publish posts, delete posts, edit published posts, and so on. While I trust all of my authors, I don’t want things to go live without going through an editorial review. So I don’t want them to have this capability.

The good thing about WordPress is that there is a plugin for just about everything. You can use a popular plugin called Members to modify the capabilities of the Author role. Once you install the plugin, go to Users > Roles and modify the Author role. Your final permissions settings should look something like this:

The roles editor

As you notice, the only abilities we’ve given Authors here are editing posts, reading posts, and uploading files.

Security and monitoring

In the past, I have seen hackers trying brute force attacks through the login page. Because each author’s URL contains their username, they only have to guess the password for an author to get access to your site. What’s worse is if your author has used the same password elsewhere, and the hacker knows this.

To prevent this kind of attack, the first thing you need to do is to limit the number of failed login attempts. This means that after three failed login attempts, the user will be locked out.

The second thing you need to do is make sure that you use the plugin Force Strong Passwords. To monitor users’ activity, you can use plugins like Audit Trail or ThreeWP Activity Monitor.

Last, but certainly not least, make sure that you have a strong WordPress backup solution in place. Of course there are other security measures you can take to protect your site in other ways, but these are the ones that are specific to multi-author blogs.

Improving your workflow

A good editorial workflow can make things a lot easier. The key to a good workflow is communication. I use a plugin called Edit Flow to make things easy for me.

The first step is to define the stages of your workflow. My workflow looks like this:

  • Draft: default auto-saved posts, or any un-assigned posts
  • Pitch: when an author pitches a post idea
  • Assigned: the editor or admin assigns the post idea to a specific author
  • In progress: the author puts the article in this mode so everyone knows that someone is working on it
  • Pending review: once the author finishes the post, they submit it for an editorial review.
  • Ready to publish: once the editorial review is complete, we make the post Ready to publish. From there, I or another admin can take a look at it and schedule it for publication.

This workflow makes the process really easy, especially when we have a lot of writers. This plugin comes with default statuses, but you can always add your custom post statuses.

The best part is that you can sort posts by the custom status. Changing the status is extremely simple.

Custom status

You can also use the Edit Flow plugin to communicate with the author from within your dashboard. This makes the communication part really easy, and prevents you juggling through emails. Also, when assigning posts to a specific author, you can set deadlines in the Editorial Meta Data option.

The plugin also gives you a convenient month-by-month calendar-view of posts. This lets you know if you have a post scheduled for a specific day or not.

Calendar view

A private area just for contributors

Over time I have learned that I don’t have to do everything myself. I can assign tasks to trusted folks in my team. The best way to establish this trust and find out who is the right person for the job is by judging their interest level. Setting up a private area just for your team members can help you determine that.

I recommend that you set up a site with P2 theme and invite your team members and authors there. Password-protect the site, so only logged-in users can see the content. And when an author stands out in this environment, you can promote them to an Editor or another position within your business.

What’s your workflow process? I’d love to hear about it in the comments. Feel free to share your tips and tricks for multi-author blogging, too.

Syed Balkhi is the founder of WPBeginner, the largest unofficial WordPress resource site that offers free WordPress videos for beginners as well as comprehensive guides like choosing the best WordPress hosting, speeding up WordPress, and many more how-to’s.

The post How to Improve Workflow in a Multi-Author WordPress Blog appeared first on ProBlogger.

How to Improve Workflow in a Multi-Author WordPress Blog
https://problogger.com/how-to-improve-workflow-in-a-multi-author-wordpress-blog/
http://www.problogger.net/archives/category/blog-networks/feed/
Blog Networks – ProBlogger
Blog Tips to Help You Make Money Blogging – ProBlogger
https://problogger.com/wp-content/uploads/powerpress/problogger_podcast-891.jpg

Powered by WPeMatico

Keep Your New Year’s Resolution: Set up a Social, Search-optimized WordPress Blog … Today

This guest post is by Marcela De Vivo of Gryffin.co.

Recently ProBlogger discussed how to brand your blog, how to find your voice, and how to build your authority.

Mouse

Image courtesy stock.xchng user panoramadi

These articles are powerful, but often I find myself speaking with people who don’t have a blog yet, or are using Blogger or custom made, cumbersome platforms. Just this week alone I went through these steps with four different people who want to jump on the blogging bandwagon.

In this article we will go back to basics for those who haven’t started their blog yet, or who are on platforms that are hindering their progress.

If one of your New Year’s Resolutions was to improve your blogging presence—or start a new one—read on!

We’ll go through a step-by-step process, including tools and resources for each step, to set up a WordPress blog that is optimized for social and search marketing success.

Setting up your WordPress blog

WordPress is currently the most popular content management platform.  It can be used for static pages or as a blog.  You can add plugins for a shopping cart, image galleries, and much more.

Here’s how to set it up.

  1. Register your domain with sites like Register.com, Godaddy.com, or Enom.com
  2. Create a hosting account with sites like BlueHost.com, WPEngine, or HostGator.  If you would like to do more research on hosting companies, check out WhoIsHostingThis.
  3. Select a WordPress theme. I personally love using StudioPress as the themes are clean, functional, and easy to work with. Search for a responsive theme so your blog will be accessible to mobile users.
  4. Is your site running on a different CMS or platform? Consider using a blog migration service, such as BlogWranglers, to move your current site over to WordPress. Hundreds of thousands have done it, with no regrets.
  5. Upload WordPress to your hosting account, and customize with your relevant theme.  If you are not a techie, this is the part where you’ll need some help.  Check out Elance.com, Freelancer.com, or a site like Craiglist.org to find someone who can help you set up and customize your template.
  6. Install WordPress plugins.

Let’s take a deeper look at the plugins you’ll need.

Setting up your plugins

Social media

These are the social media plugins I recommend you consider.

  • Disqus or CommentLuv for comments
  • Digg Digg for social engagement
  • The Slide to recommend related articles
  • Social Metrics for a quick look at your social engagement from your Dashboard
  • MailChimp to collect email addresses for email marketing

SEO plugins

My favorite SEO plugins include these ones.

  • WordPress by Yoast
  • BWP Google XML SiteMaps
  • ScribeSEO
  • Outbrain for related articles at the end of each post

Usability

Usability plugins can be a huge help. Consider these:

  • WP Smush It
  • Broken Link Checker
  • Contact Form 7
  • WP Recaptcha for captcha

Doing keyword research

To gain exposure from search engines, you need to have your blog focused on a theme. Select a primary keyword within this general theme for each page of the site.  You can read more about keyword research in this ProBlogger article.

Select keywords by identifying low-competition and high-search terms for your industry from Google’s Keyword tool.

Other tools you can use include:

    • WordTracker
    • Keyword Discovery
    • Keyword Spy
    • Spy Fu
    • Market Samurai

.

Prepare content for your static pages and images

While a designer/programmer is working on setting up your site, you can start by writing and preparing content for your site.

A well-optimized page includes the primary keywords in the Title of the page, Meta Description tag, H1 tag, once or twice in the body, and in an outbound link.

As you’re preparing your content, remember these elements of an excellent blog post:

        • Post title: creative and compelling
        • Social share icons: make sharing your content easy
        • Image: an image speaks louder than words
        • Opening paragraph: include keywords in a teaser into the introduction
        • Body copy: use headers and bold words
        • Lists: make your content easy to scan
        • Conclusion: include a teaser for your next article
        • Related posts: give them more content to consume
        • Comment section: Always respond to comments

Read Darren’s compilation from earlier this year for more information on each element in The Anatomy of a Better Blog Post.

Connect your site for optimum findability

        • Create your Webmaster Tools account on Bing and Google.
        • Use BWP Sitemap tools to create and upload an XML sitemap.
        • Set up Google Analytics and connect it to your blog.
        • Set up your Author tag on Google Plus.

By this point you should have a WordPress blog with a range of enhancements made possible by plugins and other customizations.  You will have SEO plugins to improve your on-page SEO, page load times, keyword density, site maps, and other relevant SEO features.

You will also have a selection of social plugins so that you can encourage social shares from your site. You will have other features such as contact forms, tracking, reporting, and an email signup box to build your email list.

Incorporating keyword research will help you to deliver the content that people are looking for in a way that lets it be found.  You can write articles based on long-tail terms, answer questions that your audience may have, and target hundreds of keywords by writing articles specific to each one.

So what are you waiting for? Make your New Year’s Resolution a reality and start your new blog today. And if you have any suggestions of plugins, tools, or services to add to this list, please do share!

Marcela De Vivo is a freelance writer who writes about blogging, SEO and social media at Gryffin.co/blog.

The post Keep Your New Year’s Resolution: Set up a Social, Search-optimized WordPress Blog … Today appeared first on ProBlogger.

Keep Your New Year’s Resolution: Set up a Social, Search-optimized WordPress Blog … Today
https://problogger.com/keep-your-new-years-resolution-set-up-a-social-search-optimized-wordpress-blog-today/
http://www.problogger.net/archives/category/blog-networks/feed/
Blog Networks – ProBlogger
Blog Tips to Help You Make Money Blogging – ProBlogger
https://problogger.com/wp-content/uploads/powerpress/problogger_podcast-891.jpg

Powered by WPeMatico