Every database event is important: don’t let them rot away in an old batch, forgotten to the ravages of time and irrelevance. Let’s capture all that data.
Since we are out of the office and working remotely, I need our relational database records to follow us and be sent offsite. Our physical tables may be empty, but our database ones are not. Let’s get that data streaming and useful.
Hi Guyz,
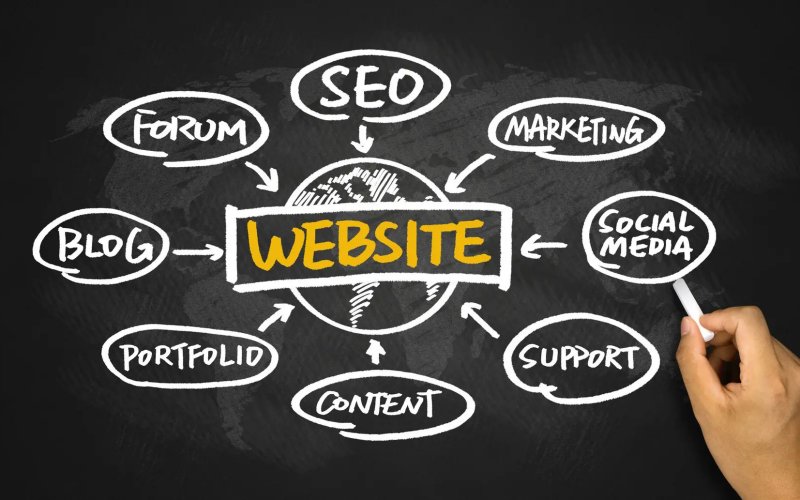
What are the Different purpose of This social medias: Facebook, YouTube, Instagram, Twitter, Pinterest, Snapchat and LinkedIn?
I can get answer also in google, Bing and from other, but I need you personal opinion on this, what do you guys really feel about this social medias Platforms?
Marketing information are facts uncovered through the analysis of promoting data. This knowledge is used to produce campaigns, articles and client experiences more info here that better meet the needs of the industry, delivering worth and travelling growth. Information come from a number of sources, both equally formal and informal. Anything that helps your business …
Calculated innate value is mostly a useful tool meant for financial analysts to determine the perceived worth of the asset, in spite of its selling price. This computation is based on many different factors, which include future growth potential, profit margins and investment levels. Yet , there are a variety of various methods pros can …
In the past, in the event you wanted to update your website, you had to down load the data from the machine, open these people and change the HTML code manually. This was a time-consuming method and if you made a blunder, it could mess up your whole site. Which has a CMS, you can …
A company management is the set of policies, techniques and procedures that enable an organization to manage their particular operations, achieve objectives, and fulfill their mission. Managing systems incorporate everything from a quality management system to an environmental management. They can also include an tips or understanding management system. It is very important that they …
Document management includes the administration of all documents inside an organization. Whether paper or perhaps digital, the proper and organized administration of those papers is vital for an organization. Simply because the business landscape designs continually evolve, employing efficient functions and strategies to manage information and paperwork is becoming more important than ever. The best …
There are two BIG questions that you’ve likely been asked repeatedly by leaders (like your CEO) over the years that are intrinsically linked to business priorities:
When will feature ABC be ready?
Can you deliver it sooner than XYZ?
Historically, answering these questions has been an exercise in divination because engineering leaders and their teams have to constantly juggle competing operational priorities that the business doesn’t always have full visibility into:
Web design can serve as a playful exploration ground for learning new techniques. In today’s guide, we’ll dive into the creation of an underwater CSS text effect, not just for the visual outcome, but to deepen our understanding of how different CSS properties harmonize to create dynamic text effects.
Your Web Designer Toolbox
Unlimited Downloads: 500,000+ Web Templates, Icon Sets, Themes & Design Assets
Starting at only $16.50/month!
Setting up the Structure
Our journey into the deep sea starts with a simple HTML structure: a div element with the class underwater, wrapping around an h1 tag.
body{
/* Using a dark background color for optimal contrast */
background-color: #000;
font-family: ‘Maven Pro’, sans-serif;
}
.underwater h1{
/* Font settings: sizing and a semi-transparent color */
font-size: 2.5rem;
color: #2c3e5010;
/* Assigning an underwater image as the background */
background-image: url(‘https://w7.pngwing.com/pngs/183/509/png-transparent-under-water-scenery-sunlight-underwater-ray-star-ocean-atmosphere-cloud-computer-wallpaper.png’);
/* Clipping the background image to the outline of the text */
-webkit-background-clip:text;
/* Setting a 10s infinite animation for a dynamic effect */
animation: waterEffect 10s infinite;
}
/* Animation to simulate flowing water */
@keyframes waterEffect {
0% { background-position: left 0 top 0; }
100% { background-position: left 100% top 0; }
}
Explaining Key CSS Properties and Values
Breaking down our CSS code, the first point of interest is the background-image property. By setting an underwater image as the background, we immediately set the tone for our effect.
The -webkit-background-clip:text property clips the background image to the shape of the text. It allows the underwater image to fill the text, setting the stage for our effect.
The color property plays a vital role as well. We’re using a semi-transparent color (color: #2c3e5010;), where the last two digits 10 represent the alpha channel in hexadecimal format, controlling the transparency. This enables the background image to shine through, enhancing the underwater illusion.
The animation property sets our waterEffect animation into motion. Defined by the @keyframes rule, it continuously shifts the background-position from left 0 top 0 to left 100% top 0, creating the illusion of water flowing over the text.
The Result
See the Pen
Underwater Text Effect by 1stWebDesigner (@firstwebdesigner)
on CodePen.
Exploring Other Methods
Different methods can achieve similar effects. An alternate approach involves utilizing the clip-path property with CSS animations, yielding a wavy text appearance akin to an underwater CSS text effect. This method manipulates the clip region of an element over time, evoking a dynamic sense of movement reminiscent of water’s rhythmic flow. In addition, the technique doesn’t necessitate a background image, instead, it transforms the appearance of the text directly. By turning to this method, you’re exposed to yet another aspect of CSS and its potential for dynamic text effects.
Optimizing your WordPress workflow often involves tweaking a few settings and functions. One of these features is post revisions. This built-in functionality can be a lifesaver, especially when you want to revert changes or restore an earlier version of a post. However, having an excessive number of revisions can be overwhelming and may clutter your database.
We’ll guide you through the steps to limit post revisions in WordPress, without turning to specific plugins.
Understanding WordPress Post Revisions
Post revisions, a core feature of WordPress, allows you to undo changes and revert to previous versions of your posts or pages. For every draft in progress, WordPress automatically generates a temporary revision (known as an auto-save) every 60 seconds. It supersedes older versions with these new auto-saves.
Alongside auto-saves, WordPress creates permanent revisions each time a user hits save, update, or publish. These permanent revisions are stored in the WordPress database and can be managed from the post-edit screen.
Why Would You Limit Post Revisions?
Limiting post revisions does not necessarily mean you’re capping your site’s performance. WordPress intelligently excludes post revisions from the database calls on the front end, only including them on the post-edit screen or while browsing revisions.
However, having a large number of post revisions can cause your WordPress database to become bulky, and although it won’t affect your site’s performance, it may make you feel a bit disorganized. Keeping your database clean and neat is good practice and can make your backend operations smoother.
The Manual Approach
Now, let’s jump into how you can limit post revisions manually in WordPress without the use of plugins.
Restricting the Number of WordPress Post Revisions
WordPress enables you to control the number of revisions retained for an article. To set a limit, you’ll need to add a specific line of code to your WordPress site’s wp-config.php file.
define( 'WP_POST_REVISIONS', 7 );
In the above code snippet, replace “7” with the desired number of revisions you wish to store for each post. Remember to save and close the file after making your adjustments.
How to Completely Turn Off WordPress Post Revisions
If your objective is to entirely disable post revisions, WordPress allows for this as well. By incorporating the following line of code into your wp-config.php file, you can turn off the post revision functionality:
define('WP_POST_REVISIONS', false );
Specifically, this command will deactivate the post revisions feature on your website. However, it’s crucial to understand that WordPress will continue to preserve one auto-save and one browser-stored revision despite this change.
Wrapping Up
Fine-tuning how post revisions are handled in WordPress can lead to a tidier database and a more streamlined content production process. It’s worth noting that manipulating core files requires a basic level of comfort with code or additional guidance. For related WordPress management topics, feel free to check out our guide on managing widgets in your WordPress dashboard.
Data integration can be a tricky business, like navigating a maze filled with dead-ends, detours, and pitfalls. But fear not! With the right map and tools, you can reach the end of the maze successfully. To help you get there, we've outlined the top 12 common pitfalls to watch out for in your data integration journey. So buckle up, and let's embark on this exciting and fun adventure together!
Are Data Format Mismatches Messing With Your Integration Goals?
Picture this: you've finally reached the heart of the data integration maze and are ready to integrate your data sources. You expect a seamless data flow, but instead, you're met with a roadblock - data in different formats. It's like discovering that your GPS uses metric while the map you have is in imperial. It just doesn't match!
This is a common issue when integrating data from different sources. For example, one data source might use the MM/DD/YYYY date format, while another uses DD/MM/YYYY. If these mismatches are not addressed, they can cause errors and prevent you from reaching the end goal of seamless data integration.
To avoid this pitfall, you must get your data in the same format before integrating it. Think of it as a translator, converting data from one language to another, making sure that everyone can understand each other.
The latest version (6.11.0) of HMS Core Scan Kit is now available, and this article aims to share some of its exciting new features with you:
The kit adds the decode API that is available to both camera-based and image-based barcode scanning scenarios.
This API supports image data in NV21 format (which is output by your custom camera API) and multi-barcode recognition. Compared with decodeWithBitmap, an API released in an earlier version that supports only the bitmap format, the decode API saves time converting the image format and delivers a faster barcode scanning process in the camera-based mode.
Content Romance Travel To Laxa, sweden Loveforheart ~ Take Motion And Find Your Soulmate! Your search may take a few months, so calculate mail order bride pricingon courting platforms within 6 months on common. As for the language barrier, it’s going to hardly be a problem. As we’ve mentioned before, plenty of Japanese women for […]
Achieving digital accessibility and optimizing your platform for screen readers, can be a strategic decision with multifaceted benefits. Not only does it reflect empathy and inclusivity for visually impaired users, but it also potentially expands your audience and the reach of your message.
Let’s delve into the importance of UX design for screen readers, practical adaptation strategies, and the continuing commitment toward digital accessibility.
The UX Designer Toolbox
Unlimited Downloads: 500,000+ Wireframe & UX Templates, UI Kits & Design Assets
Starting at only $16.50 per month!
Screen Readers: Essential Instruments for Digital Accessibility
Screen readers act as interpreters between the digital content and the visually impaired users, transforming visual data into speech or Braille output. A well-crafted UX design for these tools acknowledges the linear and sequential content interpretation that screen readers follow. To put it simply, a screen reader reads the content line by line, from top to bottom, requiring designers to create logical and understandable content flow.
Practical Suggestions for Adapting UX Design for Screen Readers
Modifying your UX design for screen readers is an iterative process that requires planning, attention to detail, and ongoing enhancements. Let’s explore some actionable suggestions.
Consistent Layouts
The fundamental principles of accessibility are predictability and consistency. Applying these principles to your web page design, with uniform layouts, allows users to intuitively anticipate the positioning of elements. Consistent placement of menus and sidebars across various pages, for example, fosters efficient navigation, especially for those relying on screen readers.
Descriptive Labels
Pay attention to the labeling of interactive elements. A button labeled as “Download Tutorial” gives users a clear direction, as opposed to a vague “Click Here.” Descriptive labels significantly improve navigability, making your site more user-friendly for visually impaired users.
Comprehensive Image Alt Text
Make your visual content accessible to screen readers with comprehensive alt text. Alt text serves as a narrative for images, assisting screen readers in conveying the purpose and context. Alt text like “Pie chart showing website traffic sources” is a valuable nugget of information for users reliant on screen readers.
Accessible Forms
Think about how your form controls can be understood by screen readers. Accurate labeling of each form field, such as indicating “Enter your name” in a name field, can improve interaction for users relying on screen readers.
Logical Content Structure
Well-structured, logically ordered content is crucial when designing for screen readers. As these tools interpret content from top to bottom, it’s essential to place significant messages and calls to action strategically for maximum impact.
An insightful study by the Nielsen Norman Group illustrates the hurdles that screen reader users encounter, especially on mobile devices. The study emphasizes that although third-party solutions can be part of the answer, solely relying on them may fall short. While they might tick the boxes for standard accessibility requirements, these tools don’t necessarily account for the specific needs of your users.
Thus, integrating accessibility improvements within your design process provides a more inclusive and tailored user experience. The goal is to create a balanced approach, incorporating third-party tools as a starting point while continuously refining your design based on user feedback and evolving accessibility standards.
Final Thoughts
Optimizing your UX design for screen readers isn’t a task you complete and forget. It’s an ongoing process, driven by user feedback and the changing landscape of accessibility standards.
Taking on this task presents the potential to cater to a wider audience, delivering both ethical and commercial benefits. The strategy of improving website accessibility can also foster business value, extending your reach to a more diverse user base.
Ensuring digital accessibility is a commitment to understanding and learning from the experiences of all users. It’s not just about compliance but about providing a seamless user experience irrespective of abilities.
Your website’s command center, the WordPress dashboard, arrives with several widgets that enhance functionality. However, not all of these may be beneficial for every user. As plugins introduce more widgets over time, your dashboard may start to feel crowded and less straightforward to navigate. WordPress offers the ability to remove these unnecessary widgets, either manually or programmatically. We’ll guide you through both of these methods, aiding in decluttering your dashboard and promoting better website management.
Understanding Widgets
Widgets are elements you can include in your WordPress site’s sidebars or other widget-ready areas. WordPress includes default widgets, and plugins may introduce more. All these widgets can be managed through the Appearance » Widgets screen in your WordPress dashboard. However, an excess of unused widgets can lead to a messy widget screen. To make your dashboard more navigable, consider disabling those you don’t need. For an in-depth look at managing widgets, you can explore the WordPress official documentation.
Manual Widget Removal from WordPress Dashboard
For the quick and temporary cleanup of your dashboard, WordPress allows you to hide widgets that you don’t frequently use. Follow these steps to hide widgets:
Log into your WordPress Dashboard.
Locate the “Screen Options” button at the top right corner of the screen and click on it.
Uncheck the boxes beside the widgets you want to hide.
While this method doesn’t eliminate the widgets entirely, it does make them invisible from your view. Other users can still enable these widgets from the Screen Options panel.
Programmatic Widget Removal from WordPress Dashboard
For a more lasting cleanup, WordPress provides a way to get rid of dashboard widgets completely, preventing other users from turning them back on. This involves adding a code snippet to your theme’s functions.php file or to the site-specific plugin you’re using. Here’s the code snippet:
function clear_dashboard_widgets() {
global $wp_meta_boxes;

unset($wp_meta_boxes['dashboard']['side']['core']['dashboard_quick_press']);
unset($wp_meta_boxes['dashboard']['normal']['core']['dashboard_incoming_links']);
unset($wp_meta_boxes['dashboard']['normal']['core']['dashboard_right_now']);
unset($wp_meta_boxes['dashboard']['normal']['core']['dashboard_plugins']);
unset($wp_meta_boxes['dashboard']['normal']['core']['dashboard_recent_drafts']);
unset($wp_meta_boxes['dashboard']['normal']['core']['dashboard_recent_comments']);
unset($wp_meta_boxes['dashboard']['side']['core']['dashboard_primary']);
unset($wp_meta_boxes['dashboard']['side']['core']['dashboard_secondary']);
}

add_action('wp_dashboard_setup', 'clear_dashboard_widgets' );
}
The function above targets and removes the widgets listed. If there are certain widgets you wish to retain, simply remove the corresponding line from the code.
To customize this further, you can add the following function to the functions.php file to restrict the dashboard widget removal to only non-admin users:
if (!current_user_can('manage_options')) {
add_action('wp_dashboard_setup', 'clear_dashboard_widgets' );
}
Concluding Remarks
Having a neat and organized dashboard is a significant step towards more efficient WordPress management. Discarding unnecessary widgets tailors your dashboard to your exact needs, fostering a more effective and enjoyable user experience.
Aside from decluttering your dashboard, there are other optimization steps you can take to bolster your website’s performance and security. For instance, hiding your WordPress version can contribute to creating a more secure WordPress environment.
We hope these tweaks will help you maintain a clean and efficient dashboard, helping you focus on what truly matters: creating outstanding content.
Google’s Material Design guidelines introduced the ripple effect, a subtle animation that indicates user action. The ripple effect rapidly gained popularity in web design as a sophisticated visual feedback form that refines user interaction, particularly on buttons. Today, we’ll show you how to create a ripple button effect using nothing but pure CSS.
Your Web Designer Toolbox Unlimited Downloads: 500,000+ Web Templates, Icon Sets, Themes & Design Assets
Building the Button
The basic structure of our button is quite simple. It’s a single line of HTML:
<button class="btn-ripple">CLICK ME</button>
This is a standard button element with a class btn-ripple attached to it, which will be our reference when we define the ripple effect in CSS.
Casting Ripples With CSS
/* Styling for the ripple button */
.btn-ripple {
  border: none; /* Removing the default button border */
  border-radius: 6px; /* Giving our button rounded corners */
  padding: 12px 16px; /* Providing some padding around the button text */
  font-size: 1.2em; /* Increasing the font size of the button text */
  cursor: pointer; /* Changing the cursor to a hand icon when hovering over the button */
  color: white; /* Making the button text color white */
  background-color: #fa6e83; /* Setting the initial button background color */
  outline: none; /* Removing the outline from the button */
  background-position: center; /* Setting the position of the background image to center */
  transition: background 1s; /* Adding a transition to the background color */
}

/* Defining the hover state */
.btn-ripple:hover {
  background: #f94b71 radial-gradient(circle, transparent 1%, #f94b71 1%)
    center/15000%; /* Creating a radial gradient background on hover */
}

/* Defining the active (clicked) state */
.btn-ripple:active {
  background-color: #f97c85; /* Changing the button color when active */
  background-size: 100%; /* Increasing the size of the background image */
  transition: background 0s; /* Removing the transition from the background color */
}
Let’s break down the CSS setup:
The .btn-ripple class sets up the basic appearance of the button. The background-color is initially set to #FA6E83, a light color, and the background-position is centered to ensure our ripple effect starts from the middle of the button.
When you hover over the button, the :hover pseudo-class is activated. It changes the background to a radial gradient that’s centered where the pointer is located, simulating the ripple effect. The gradient starts as transparent (transparent 1%) and transitions to the button color (#F94B71 1%), creating a soft ripple effect.
Upon clicking the button, the :active pseudo-class takes effect. It changes the background-color to a darker shade (#F97C85) and expands the background-size to 100%, reinforcing the ripple effect. The transition for the background is also set to 0s, making the effect appear instantaneously when the button is clicked.
The Result
See the Pen
Pure CSS Ripple Button Effect by 1stWebDesigner (@firstwebdesigner)
on CodePen.
Final Thoughts
We demonstrated a classic example of how simple CSS can be used to create appealing interactivity in a user interface. But as you strive to refine your UI, it’s critical to remember that each interface element might require different tweaks.
Consider the context in which your buttons are used. A button for submitting form data might benefit from a more subdued ripple effect, while a call-to-action button could be more prominent with a stronger one.
For more intricate animations or synchronizing with other UI events, JavaScript could be leveraged for more granular control. CSS provides a solid base for styling and basic animations, but JavaScript opens up more advanced possibilities.
And of course, customization is key. While we used specific colors for our ripple button here, feel free to experiment with colors, shapes, and transitions that align with your brand and design aesthetic.
Recently, mirror sites providing access to ChatGPT have started to appear. However, using them is unsafe because such sites can collect and analyze all your correspondence. Especially those sites that provide such access completely free of charge. There is a demand for such sites because some countries block access to ChatGPT, and OpenAI blocks access to some countries. And for some users, 20 dollars for a ChatGPT subscription is expensive.
So today, we will write our own chatbot based on ChatGPT in the Telegram messenger.