Did you know you can receive an SMS notification each time a form is submitted on your WordPress site, eliminating the need for constant email or active website monitoring? If you’ve been searching for a practical method to stay updated on new inquiries from your site visitors, implementing SMS notifications from your contact form is […]
Put simply, it's page-by-page navigation. It's a way to display a large amount of homogeneous information by dividing the content into pages. Many Salesforce developers, myself included, often encounter pagination when displaying a significant volume of data on the user interface. On one of my projects, we were presenting phone numbers in a data table. However, in certain cases, the data wouldn't display, as the information retrieval took too long. Users were unable to access any data. So, why did this happen?
1. Contacts Were Selected Through Several Nested Database Queries
We were dealing with multiple levels of parent-child relationships between Contacts and child objects. Due to business logic requirements, we needed to filter contacts based on filters applied both to the contacts themselves and to filters applied to the child objects of the contacts.
Are you wondering how to style your WordPress forms?
You can customize your forms to match your WordPress website’s design. This can create a more visually appealing and professional look for your site and improve the user experience.
In this article, we will show you how to easily customize and style WordPress forms, step by step.
Why Customize and Style Your WordPress Forms?
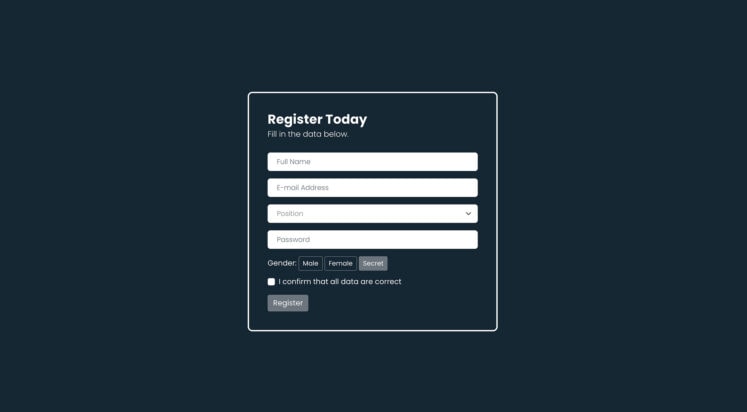
When you add a form to your WordPress website using a plugin, you will notice that its layout is usually simple and plain-looking.
For example, if you add a registration form to your website using a user-registration form plugin, then you will see that its layout is a bit boring. This can fail to capture your visitor’s attention and even discourage them from filling out the form.
By customizing your forms, you can match them to your WordPress theme and your branding to make them more attractive.
This can lead to more conversions because styled WordPress forms are easier to navigate and can encourage more users to fill them in.
Styled forms can also increase your brand awareness among users. For instance, you can use your website logo and signature company colors to make your form more memorable and effective.
Having said that, let’s see how to easily customize and style your WordPress forms, step by step. We will cover 2 methods in this post, and you can use the quick links below to jump to the one you want to use:
WPForms comes with a drag-and-drop builder that makes it super easy to create any kind of form you want. Plus, it even has built-in customization options for your form that don’t require any coding.
First, you need to install and activate the WPForms plugin. For detailed instructions, you may want to see our step-by-step guide on how to install a WordPress plugin.
Note: WPForms also has a free version that you can use for this tutorial. However, we will be using the premium plugin because it has more settings and options.
Upon activation, you need to visit the WPForms » Settings page from the WordPress admin sidebar to enter your license key.
You can find this information in your account on the WPForms website.
Once you’ve done that, head over to the WPForms » Add New screen from the WordPress dashboard.
This will take you to the ‘Select a Template’ page, where you can start by typing a name for your form. After that, you can pick any form template that you want and click the ‘Use Template’ button under it.
For the sake of this tutorial, we will be creating and adding a simple contact form to our website.
This will launch the template in the WPForms form builder, where you will see a form preview on the right and form fields in the left column.
From here, you can drag and drop any form field of your choice to the form according to your liking.
Once you are done customizing your form, simply click the ‘Save’ button at the top to exit the form builder.
After that, you need to visit the WPForms » Settings page from the WordPress dashboard and check the ‘Use Modern Markup’ option. If you fail to check this box, then the WPForms customization settings won’t be available in the block editor.
Don’t forget to click the ‘Save Changes’ button to store your settings.
Next, open the page or post where you want to add the form that you just created.
From here, you need to click the add block ‘+’ button in the top left corner of the screen to open the block menu and add the WPForms block.
Once you have added the block, simply select the form that you want to add to your site from the dropdown menu within the block itself.
Now that you’ve added the form, it’s time to customize it and style it.
To do this, you must open the block panel on the right side of the screen and scroll down to the ‘Field Styles’ section.
From here, you can select a size for your form fields from the dropdown menu and even set a border radius for them.
Next, you can change the background, text, and border color of the form fields by using the color picker tool.
Here, you can use your brand’s signature colors or other colors that are used on the rest of your WordPress blog to create a visually appealing form.
Once you’ve done that, scroll down to the ‘Label Styles’ section, where you can select the font size of the labels from the dropdown menu.
After that, you can also change the font color of the labels, sub-labels, and error messages that will be displayed in your form.
To customize the button in your form, you need to scroll down to the ‘Button Styles’ section and choose its size from the dropdown menu.
You can also set a border radius and change the background and text color of the form button.
Once you’ve finished customizing the form, simply click the ‘Update’ or ‘Publish’ button at the top to store your settings.
Now, you can visit your site to view the styled WordPress form in action.
Method 2: How to Style WordPress Forms With CSS (Advanced Customization)
If you don’t want to use the customization options offered by WPForms or you want to apply different customizations with CSS, then you can also use a custom CSS snippet.
To do this, first, you will have to create a form using WPForms, which is the #1 form builder on the market.
It is a drag-and-drop builder that comes with many templates that you can use to create contact forms, file upload forms, registration forms, RSVP forms, and much more.
Once you have created a form, it’s time to customize it using WPCode, which is the best WordPress code snippets plugin on the market.
It is the easiest and safest way to add CSS code for styling your WordPress form.
First, you will need to install and activate the WPCode plugin. For detailed instructions, you may want to see our beginner’s guide on how to install a WordPress plugin.
Note: WPCode has a free version. However, you will need the premium plan of the plugin to unlock the ‘CSS Snippet’ option.
Upon activation, visit the Code Snippets » + Add Snippet page from the WordPress dashboard.
Once you are there, just click the ‘Use Snippet’ button under the ‘Add Your Custom Code (New Snippet)’ option.
This will take you to the ‘Create Custom Snippet’ page, where you can start by typing a name for your code snippet.
After that, select the ‘CSS Snippet’ option from the dropdown menu in the right corner of the screen.
Next, copy and paste the following code into the ‘Code Preview’ box:
Once you’ve done that, you will have to replace the default shortcode at the top with the shortcode of the form that you want to customize.
To do this, visit the WPForms » All Forms page from the WordPress dashboard and copy the WPForms ID number of the form that you want to style.
After that, paste the ID number of the form next to the wpforms- line in the code. Now, all the code will be executed in this specific form only.
Next, you can easily change the hex code for the background color, add a font family of your choice, and configure the padding and border radiuses of the form by changing the code snippet.
Once you have done that, scroll down to the ‘Insertion’ section and select the ‘Auto Insert’ mode.
The code will automatically be executed on your site upon activation.
Finally, scroll back to the top of the page and toggle the switch to ‘Active’.
After that, click the ‘Save Snippet’ button to store your settings
Now, the WordPress form will automatically be customized according to the CSS snippet, and you can go view it.
However, if you haven’t added the form to your website yet, then just open a page or post in the block editor.
Once you are there, click the ‘+’ button in the top left corner to open the block menu and add the WPForms block.
After that, select the form that you styled using the CSS snippet from the dropdown menu in the block itself.
Finally, click the ‘Update’ or ‘Publish’ button to store your settings.
Now, you can visit your WordPress site to see the customized form in action.
Bonus: How to Create Custom Website Pages
Styling WordPress forms is just one way to make your site more attractive and visually interesting. You can also design your own fully customized website pages using SeedProd.
SeedProd comes with a drag-and-drop builder, pre-made templates and site kits, easy customization options, color palettes, and advanced page blocks. Plus, you can easily embed your WPForms forms within the SeedProd editor.
You can even use SeedProd to create a viral waitlist page, a sales page, a maintenance page, a coming soon page, and so much more.
Our formtastic team’s done it again! Forminator’s new Geolocation Add-on with Google Maps API integration lets you effortlessly gather geolocation data from your form submissions and provide address auto-completion for a smoother user experience.
See where form users are located with Forminator’s new geolocation feature.
After releasing the highly anticipated PDF Generator Add-on, we’re proud to announce another powerful addition to our form-building plugin…Geolocation add-on!
If your business needs to collect location information from users, Forminator Pro with Geolocation Add-on is the only form-building plugin you’ll need.
Key Benefits of Using Forminator’s Geolocation Add-on
With Forminator’s Geolocation Add-on enabled, you can enhance forms on your site in the following ways:
Accurate Location Detection
Forminator can precisely pinpoint the user’s location by harnessing the device’s GPS or IP address.
This information is seamlessly integrated into your forms, giving you real-time access to where your users are located.
Moreover, the Geolocation feature includes a convenient address lookup function, allowing users to search for and select their location using postal addresses, city names, or zip codes.
See the user’s location in your form submissions.
Interactive Map View
One of the standout Aspects of the Geolocation feature is its map view. Not only can users see their location on a map but also interact with it.
Users have the option to manually input their location or select it directly from a map marker. This dynamic map view enhances user engagement and makes it easy for users to provide accurate location details.
Customization Options
Forminator’s Geolocation offers a range of customization options to suit your needs. You can configure the display of Google Maps next to your address field, choose whether to position the map above or below the address field, and even adjust the map’s size, ensuring a responsive or custom fit for various devices.
Additionally, you have the flexibility to set a default map location based on specific latitude and longitude coordinates.
You can easily customize your map’s geolocation options.
Seamless Integration
To utilize the Geolocation feature, simply enter your Google Maps API key in the Geolocation settings, ensuring a seamless and reliable experience for your users.
Global Settings
For ease of use across all your forms, you can enable Geolocation as a default setting on all address fields throughout your site. This simplifies the process of collecting location information from your users.
Enable Geolocation as a default setting on all new forms.
User-Friendly Configuration
If you require users to provide location access before submitting a form, the “Require access to users’ location” option can be enabled. Additionally, you can customize the error message displayed if users choose not to provide location access.
How To Use Forminator’s Geolocation Add-on
To install and use the Geolocation Add-on, you’ll need to have Forminator Pro installed and activated on your site.
Forminator Pro is included in all paid memberships, so if you’re not a WPMU DEV member yet, consider becoming one by choosing one of our risk-free membership plans.
With Forminator Pro installed, go to the Add-Ons section of the plugin’s menu and click Install.
Install Geolocation in the plugin’s Add-Ons screen.
Once the plugin has been installed, click Configure.
You’ll need to configure the Add-On before you can use it.
You’ll need to add a valid Google Maps API key to enable and set up geolocation on your forms. Refer to our Forminator Docs for instructions on obtaining this key if you need help with this step.
Enter your key into the Google Maps API field, switch the toggle on to enable geolocation as the default option for all your new forms (optional), and click the Save button to continue.
Enter your Google Maps API key.
Once the API key has been validated and the configuration has been successfully saved, a confirmation message will display briefly on your screen letting you know that you’re all good to go.
Note: You can access additional Geolocation configuration settings for individual forms (e.g. disabling geolocation or making it mandatory for users to provide their location details in order to submit a form) in the Forms > Edit Form > Settings section.
Configure additional Geolocation settings in the Form Settings section.
With the addon configured, let’s go through an example of adding Geolocation field to a form.
Adding Geolocation Fields To Forms
In the Forms section, select a form or create a new form and select Edit > Fields.
Click on the Insert fields button to add Geolocation to a form.
Select the Address field and click the Insert Fields button.
Add an address field to your form.
The Address field is highly customizable and includes a Geolocation tab with advanced options for configuring maps, such as:
Autocomplete: Provides real-time suggestions as users enter an address into the field.
Display address in Map: Displays a map next to the address fields
Map Position: Choose whether to display the map above or below (default) the address field.
Map Size: Set a responsive or custom size for your map.
Default Map Location: Set a default of custom location for your map.
Forminator Address field settings include advanced Geolocation options.
Configure the above settings to suit your needs and to facilitate user interaction with your form maps and a great user experience.
For example, enable autocomplete to display matching locations as users start typing and to fill in the address fields automatically when an address is selected from the options displayed.
Enable autocomplete for a smoother and more interactive user experience with form maps.
Once the browser loads the form page, it will prompt users to give access to their location. Allowing this access will then show the user’s current location on the map and auto complete the address fields.
Enabling autocomplete also prefills all address details on the form.
By simply clicking on different points on the map, users can also change their location and update address fields.
Clicking on different points on the map changes the address on the form fields.
All form information including the user’s geolocation details and a map will also display on Forminator’s submission page.
An example of a Forminator form submission showing a map with the user’s location and coordinates.
It’s All About Geolocation, Geolocation, Geolocation
Forminator’s new Geolocation feature empowers you to collect and leverage location information from your form users, gain valuable insights into your audience, whether they are customers, employees, or suppliers, and make more informed business decisions.
Check out this feature in Forminator Pro and if you need any help, see our documentation or contact our expert 24/7 support team.
Do you want to create an online poll on your WordPress site?
Polls are an interactive way to engage your audience while getting useful information from them. You can get feedback from your users and find out what they like.
In this article, we will show you how to easily create and add a poll in your WordPress.
Which Tool to Choose for Adding a Poll in WordPress?
Adding interactive polls to your website is a great way to engage users, as it instantly grabs their attention. You can generate leads using polls and, at the same time, collect valuable feedback from your audience.
That said, there are plenty of plugins and online tools that allow you to embed polls on your WordPress site. Many of them require you to create an account, some store data on their own servers, and others have a terrible user experience.
If you are looking for a good user experience with full control of poll data, then you’ll need WPForms. It is the best WordPress form builder plugin and includes powerful surveys and polls addon.
With WPForms, you’ll be able to do the following:
Create polls in WordPress using a drag-and-drop form builder
Gather poll results on your own websites
Show votes count when user submit their vote
Display poll anywhere on your website
Show poll results anywhere on your website
With that, let’s look at how to easily create online polls in WordPress using WPForms.
You will need the WPForms Pro plan because it includes the survey and polls addon. WPBeginner users get an additional discount by using the WPForms coupon code. There is also a WPForms Lite version you can try for free.
Upon activation, you need to visit the WPForms » Settings page to enter your license key. You can find this information in your WPForms account.
Next, you need to visit WPForms » Addons page and scroll down to the Surveys and Polls addon.
Go ahead and click on the ‘Install’ addon button.
Now you are ready to create an online poll.
You can start by going to WPForms » Add New page to create a new form. First, you need to provide a title for your poll form and then select the ‘Poll Form’ template.
This will launch the WPForms drag-and-drop form builder interface.
You will see a pre-made poll form template with example fields already added to the form.
There are options to add new form fields from the left column. All you have to do is drag and drop the field you’d like to add to the form.
Besides that, you can just point and click to edit any field, rearrange them, or remove them.
For example, if you click the poll question in the template, then you will see more options in the menu on your left. Simply rearrange the order, and edit their titles, labels, and more.
Next, you need to click on the Settings button from the left menu and then go to the ‘Surveys and Polls’ tab. Here you can enable or disable the poll results option.
By default, the WPForms poll template will display poll results to users after they submit their votes. If you disable this option, then users will not see the poll results.
On the other hand, you can show users a custom message or redirect them to another page or URL.
Simply go to the ‘Confirmation’ tab. Here, you can choose the Confirmation Type from the dropdown menu.
Once you have created the poll form, go ahead and click on the ‘Save’ button to store your form settings.
Adding The Poll to Your WordPress Website
WPForms makes it easy to add your online poll anywhere on your website, including posts, pages, custom post types, and sidebar widgets.
You can click the ‘Embed’ button in the form builder to add your poll form. Once you do that, a new popup window will open. You can select an existing page or create a new one to embed your form.
Let’s select the ‘Create New Page’ button for this tutorial.
In the next step, you’ll need to enter a name for your page. After that, you can click the ‘Let’s Go’ button.
Another way of adding your form is by using the WPForms block. Simply click the ‘+’ button to add the WPForms and select your form from the dropdown menu.
Next, you’ll see a preview of your form.
You can save or publish your post/page and visit your website to see your poll in action.
You can also add your poll to a sidebar or widget-ready area.
To do that, you need to go to the Appearance » Widgets page and add the WPForms widget block to a sidebar where you want to display the poll.
In the WPForms widget block, you need to select the poll form you created earlier.
Don’t forget to click the ‘Update’ button to store your widget settings. You can now visit your website to see your online poll displayed in a sidebar or another widget-ready area.
Viewing Live Poll Results
If you have enabled poll results, then your users will see the results after submitting their votes.
You can also view poll results at any time without submitting a vote.
Simply visit WPForms » All Forms page and click on the ‘Survey Results’ link below your poll form.
This will take you to the poll results page, where you will see poll responses in an interactive chart.
You can change the charge type and export the results in JPEG, PDF, and print formats.
Embed Poll Results Anywhere in WordPress
WPForms also allows you to easily embed your online poll results anywhere on your website. This is particularly useful if you have disabled poll results and want to share them later.
First, you will need to find out your poll form’s ID. You can do this by going to WPForms » All Forms page and looking for the shortcode next to your poll form.
In the shortcode, you will find your poll’s ID number. For example, our test poll’s ID is 76, as shown in the screenshot above.
Next, you need to find out the field ID. This is the field in your form for which you want to show the results.
Simply edit your poll form and click on the poll field. You will find the field ID in the left column.
Now that you have both required IDs, you can go ahead and add the poll results shortcode like this:
Don’t forget to replace the form ID and field ID values with your own. You can use this shortcode in WordPress posts, pages, and text widgets.
Here’s a preview of what your poll results will look like:
Do you want to add a login form to your WordPress sidebar?
A login form in the WordPress sidebar allows users to quickly log in from anywhere on your website. Having easy access to a login form can increase sales for ecommerce sites, boost retention for online courses, and more.
In this article, we will show you how to easily add a custom login form to your WordPress sidebar.
When and Why Do You Need a Custom Login Form in WordPress?
Since the sidebar appears throughout a website, it makes the login form more noticeable and easily accessible from every page on the site.
Adding a login form to your WordPress sidebar makes it easy for users to sign in to their accounts quickly. This boosts engagement, provides a better user experience, and increases form conversions.
That said, let’s look at how to add a login form to your WordPress sidebar easily. We’ll show you how to add the default login form in the sidebar and create a custom login form.
You can click the links below to jump ahead to your preferred section.
Method 1: Adding Default WordPress Login Form in Sidebar
You can show the default WordPress login form in the sidebar of your website. This makes it super easy for users to enter their username and password to access the WordPress admin area.
For this tutorial, we’ll use the Astra theme. Do note that the options may vary depending on the WordPress theme you’re using.
To start, you need to go to Appearance » Widgets from your WordPress dashboard.
From here, you can click the ‘+’ button and scroll under the ‘Theme’ heading and click on the ‘Login/out’ widget block to add it to your sidebar.
Next, you’ll see the ‘Login/out’ block in your widgets area. You can then enable the options to display login as a form.
When you’ve made the changes, click the ‘Update’ button at the top.
After that, you can visit your website to see the default WordPress login form in action.
Do note that you’ll be logged in if you immediately go check the form. Simply log out of your site to see how the form will appear to your members.
Method 2: Adding a Custom Login Form Using WPForms Plugin
The default WordPress login form only offers a username and password field. However, you can create a custom user registration form with more fields and customization options.
The best way to do that is by using WPForms. It is the most popular WordPress form plugin, and the premium version of WPForms allows you to easily create WordPress login and registration forms with custom fields.
WPBeginner users can use the WPForms Coupon: SAVE50 to get 50% off on their purchases.
Upon activation, you need to visit WPForms » Settings page to enter your license key. You can get your license key from your WPForms account on their website.
After verification, you need to go to WPForms » Addons page.
From here, you need to scroll down to the ‘User Registration Addon’ and click on the ‘Install Addon’ button.
The addon will now automatically install and activate on your website.
You are now ready to create a custom WordPress login form. Simply visit WPForms » Add New page to launch the WPForms builder.
First, you need to enter a form name at the top and then select the built-in ‘User Login Form’ template. Simply hover over it and click the ‘Use Template’ button.
It will display the login fields pre-loaded in your form. You can click on a field to edit it or add new fields from the left column.
WPForms offers multiple form fields you can add using the drag-and-drop builder. For example, you can add a name or CAPTCHA form fields to the login form.
Afterward, head to the ‘Settings’ tab and click on the Confirmation section.
This is where you need to define what to do once a user successfully logs in to your site.
The options include a message, a custom page, or a redirect URL to any page on your site.
Ideally, you would want to redirect users to a page once they are logged in. This could be your homepage, WordPress admin panel, or any other page on your website such as their membership dashboard or client portal.
Next, you can click the ‘Save’ button at the top and exit the form builder.
Your login form is now ready. From here, you can add it to your WordPress sidebar.
Simply visit the Appearance » Widgets page in your WordPress admin area. On this page, add the ‘WPForms’ widget block in the sidebar widget area of your site.
Next, you can select your user login form from the dropdown menu.
You can view more options in the settings panel on your right. For instance, there are options to show the form title and description.
Don’t forget to click the ‘Update’ button when you’re done.
You can now visit your website to see the custom login form.
Most websites need a way for customers, potential clients or regular readers to reach out. You could buy a theme that has a custom contact page built-in, or try to code a contact page yourself, but these options are typically either costly or complicated. You don’t have time for that – which brings us to […]
Do you want to create a booking form in WordPress?
Many websites and businesses rely on bookings. If you accept appointments, then a booking form can help you schedule more appointments and boost your profits. It can also remove a lot of the time-consuming admin work that often comes with managing bookings.
In this article, we’ll share three ways to create a booking form in WordPress.
Why Create a Booking Form in WordPress?
Think about all the times you’ve booked an appointment. This can be anything from a doctor’s appointment, to scheduling a callback, reserving a table at your favorite restaurant, or even booking tickets to a concert or movie.
Sometimes, you may have made the booking by calling the business. However, most of the time you’ve likely booked online.
More and more, we expect to book all kinds of appointments online, without ever speaking to a real person.
Your customers and visitors expect this as well.
If your business accepts appointments, then it’s smart to create an online booking form. This is any form that lets visitors book an appointment, buy tickets to an event, or make a reservation online.
With a booking form, you’ll never lose another customer just because you weren’t around to answer the phone.
Booking forms can also automate a lot of the booking process. This includes collecting payments and sending your customers helpful reminder emails. This can improve the quality of the customer experience. It can also save you from lots of annoying admin work.
That said, let’s take a look at how you can create a booking form in WordPress. We’ll show you 3 ways to do this, so simply click the links below to jump to the method you prefer:
Method 1. How to Create a Booking Form Using WPForms (Recommended)
WPForms is the best form builder for WordPress used by over 5 million websites. You can quickly add a booking form to your website using the plugin’s simple drag and drop builder.
There are even ready-made templates that can help you get started. This includes event planning templates, feedback forms, and user registration templates.
Plus, WPForms integrates with all of the top email marketing providers. This makes it easy to send notifications and appointment reminder emails to both your customers, and your staff.
For this post, we’ll be using the WPForms Pro version because it has lots of different templates and powerful addons. If you’re looking for a free form builder plugin, there is also a WPForms Lite version. It just doesn’t include all of the premium templates and integrations.
First, you’ll need to install and activate the plugin. If you need help, then please see our guide on how to install a WordPress plugin.
After activating WPForms, head over to WPForms » Settings in your WordPress dashboard. You can now enter your license key. You’ll find this key in your WPForms Account.
Next, you need to go to WPForms » Add New. To start, give your booking form a name.
WPForms has lots of different templates so you can quickly get started and build all kinds of forms. Since we’re creating a booking form, it makes sense to select the Event Planning category in the sidebar.
Here, you’ll find templates for ordering wedding flowers, booking a school trip, hiring a DJ, and everything in between.
To preview a template, click on its View Demo button. This opens the template in a new tab.
When you find a design that you want to use, click on the orange ‘Use Template’ button. This launches the WPForms drag and drop editor.
In this tutorial, we’re going to use the Online Event Registration RSVP form. This form has fields where customers can type their name and email address.
It also asks visitors how they heard about your event. This can help you pinpoint the marketing channels and sources that are bringing you the most conversions.
You can use this information to plan your future marketing activities, and drive more people to your booking form. For more information about conversion tracking, see our ultimate guide on conversion tracking in WordPress.
The Online Event Registration RSVP template also lets visitors add multiple people to a single booking. This is perfect for events that often attract group bookings, such as tours, or shows.
Finally, customers can use the dropdown menus to choose the date and time when they want to attend your event.
All of these fields are completely customizable. To edit a field, simply give it a click. The sidebar will then update to display all of the settings for the selected field.
You can also add more fields to your booking form template. If it isn’t already selected, then click on the ‘Add Fields’ tab in the left-hand menu.
Then, simply drag and drop your chosen field into place on your booking form. You also change the order these fields appear in your form using drag and drop.
Once you’ve finished editing your booking form, click on the Save button.
Now that you’ve created your booking form, it’s important to set up some notifications.
Every time someone fills in the booking form, WPForms will send an email to your WordPress admin by default. Sometimes, you may want to send these emails to a different address. You may even want to email multiple people.
This is easy to do using WPForms. To edit your email notifications, click on Settings in the left-hand menu. Then, select Notifications.
On this screen, find the ‘Send To Email Address’ field. By default, this is set to {admin_email}. This is a dynamic value that tells WordPress to use the email address that’s linked to your WordPress admin account.
You can delete this dynamic text and replace it with any other email address. Simply type the new address directly into the ‘Send To Email Address’ field.
If you want to email multiple people, then just separate each address with a comma.
You need to make sure all of the emails sent from your website go to the recipient’s email inbox and not to the spam folder. The best way to do this is by using an SMTP service provider. For more details, see our guide on how to fix WordPress not sending email issue.
Once you’ve finished building your WordPress booking form, it’s time to publish it. You can either create a new page, or add this form to a page that you’ve already created.
With that said, the process is exactly the same. Simply open the webpage where you want to display your booking form. Then, click on the black + icon.
WPForms has its own block, so start typing ‘WPForms.’
When this block appears, add it to your webpage.
In your new WPForms block, click on the dropdown menu and select the booking form that you just created.
You can now update or publish your page.
That’s it! Visit your website and you should now see your booking form in action.
Method 2. How to Create a Booking Form Using Formidable Forms
Formidable Forms is the most advanced WordPress form plugin in the market. You can use Formidable Form’s drag and drop interface to create a booking form with more advanced features such as calculations.
In this post we’ll be using Formidable Forms Pro because it has a good selection of booking form templates. This makes it easy to create a user-friendly booking form for your WordPress website.
The first thing you need to do is install and activate Formidable Forms Lite, which is the free version of the plugin. Formidable Forms Lite acts as the base for the advanced features of the Pro version. For more details, see our guide on how to install a WordPress plugin.
Once you’ve done that, you need to go to Formidable » General Settings. Then, click on the ‘Click to enter a license key manually’ link.
You’ll find your license key in the Downloads section of your Formidable Forms account.
You can now paste your license key into this box and click on the ‘Save License’ button.
After activating your license key, select Formidable Forms from the WordPress menu.
Then, click on the ‘Add New’ button.
You can now pick the template that you want to use. Since we’re building a booking form, you may want to focus on the Event Planning category.
To view all of the templates in this category, start typing ‘Event Planning’ into the search field. When the Event Planning category appears, give it a click.
You can now pick the template that you want to use. We’re using the Travel Booking template in all of our screenshots.
After choosing your template, give it a name and enter a description. Then, click on Create. This launches your template in the Formidable Forms editor.
To edit a field, give it a click. The Formidable Forms sidebar will then display all of the different settings for your chosen field.
This sidebar also has different fields that you can add to your form. You may want to use these fields to collect more information from your visitors or give them choices. For example, you might let them request a room with a sea view, or ask about their dietary requirements.
You can also change where each field appears in your form by using drag and drop.
Once you’re happy with your design, click on Update to save your changes.
If someone completes your booking form, then you’ll want to know about it! Just like WPForms, Formidable Forms sends email to your WordPress admin by default.
If you prefer, then you can tell Formidable Forms to send these emails to any other address. You can even send these emails to multiple accounts.
To customize these default emails, click on the Settings tab. Then, select ‘Actions & Notifications’ from the left-hand menu.
Next, click on Send Email. This adds a new section that has all the settings you need to set up your email notifications. This includes changing the person who gets these emails, or adding more people.
The final step is adding this booking form to your WordPress website.
At the very top of the screen, click on the Embed button. This opens a popup where you can choose to add this form to an existing page, or create a new page.
Another option is adding this form to a widget. This can be an easy way to display your booking form in your theme’s sidebar, or header.
If you want to add your form to a widget, click on Insert Manually. Formidable Forms will then display a shortcode. You can now copy this code and paste it into any Shortcode block.
A web form is an HTML form on a web page that allows users to enter their information as required. Most users interact with websites through the use of HTML forms from which data will be collected by a series …
Web forms are everywhere. Almost every person on this planet who uses the internet will fill in at least one form occasionally. A web form, also called an HTML form, is an essential part of a website that allows user …
Do you want to display your form in a single line?
Single line forms give you more flexibility with form placement. This means you can easily add forms to high traffic areas of your site and improve your conversions.
In this article, we’ll show you how to display your form in a single line in WordPress easily.
Why Display a Single Line Form in WordPress?
Single line forms give you more flexibility when choosing where to place your forms. Since this style of form is only a single line, they don’t take up much space and can easily be integrated with your existing content.
Email newsletter sign up forms are often displayed in a single line above or below blog post content. Single-line forms also work well on landing pages, contact pages, and other important pages on your website.
Beyond generating more subscribers and leads, you can turn any kind of form into a single line form. For example, it might make sense to display your contact form in a single line to save space on the page.
That being said, let’s show you how to display a single line form on your WordPress website.
Creating Your Single Line Form in WordPress
For this tutorial, we’ll be using the WPForms plugin to create a single line form. It’s the best lead generation plugin for WordPress used by over 5 million websites.
You can use the drag and drop builder to quickly create any form for your site. Plus, it integrates with popular email marketing tools so you can easily grow your email list.
There is a premium version of the plugin with many more features, but we’ll use the lite version for this tutorial since it lets you create a simple form and connect it to Constant Contact for lead generation.
First thing you need to do is install and activate the plugin. For more details, see our beginner’s guide on how to install a WordPress plugin.
After that, go to WPForms » Add New in your WordPress admin panel and give your form a name. Then, you need to choose your form template.
We’ll select the ‘Opt-In Form’ template. Simply hover over the template and click the ‘Use Template’ button.
This brings up the drag and drop form builder.
You’ll see that the template we chose automatically includes the name and email fields and a submit button.
Every field can be edited by clicking on them and making changes in the left hand column.
You can also drag and drop the fields to change their order.
Once you’re done customizing the fields, you can display your form in a single line.
To do this, go to Settings » General and then click on the ‘Advanced’ drop down tab.
Next, type ‘inline-fields’ in the ‘Form CSS Class’ box (without quotes).
This will apply that CSS class to the form. Since WPForms includes styling for the ‘inline-fields’ class, it will automatically make your entire form display nicely on a single line.
After that, you can make your form even smaller by hiding the field labels.
Simply click on the ‘Fields’ navigation option, then select the ‘Advanced’ menu option, and click the ‘Hide Label’ toggle to turn it on.
Then, you need to do the same thing for all of the form field labels.
After that, in the same ‘Advanced’ section, you can enter text into the ‘Placeholder’ box.
This tells your users what each form field is for.
Once you’re done customizing your form, make sure to click the ‘Save’ button to save your changes.
If you’re using your form to generate leads, then you can connect your form to your email marketing provider. For more details, see our guide on how to create an email newsletter the right way.
Adding Your Single Line Form to Your WordPress Website
Now, it’s time to add your single line form to your website. You can add it to any page, post, or widget area.
We’re going to add it to an existing page, but the process will be similar if you’re adding it to another area of your WordPress blog.
Simply open up the page where you want the single line form to display, click the ‘Plus’ add block icon, and search for ‘WPForms’.
Then, click on the ‘WPForms’ block to add it to your site.
This brings up a drop down box to choose the single line form you created earlier.
Once you choose your form, the plugin will load a preview of your form inside the content editor. Then, click the ‘Update’ or ‘Publish’ button to make your new form live.
Now, you can visit your website to see your new form in action.
how to create an app that employees can use to manage the main warehouse. The app must allow the user to enter the spare parts by serial number, name and/or use an external par code reader and specify which parts were dispatched to which aircraft notified by its number in the fleet. The app will then calculate the quantity of items for each type of spare part along with the price of the item then the App MUST give warnings about the remaining balance of the spare parts when it reaches only 4 items left in stock. If a user attempts to quarry about a certain item he should be able to do it using items serial number, or items name, an error message will be displayed informing the user that necessary input is missing. The GUI of the App must show the logo of the company (choose one of your own design) along with company name and contact details (address, telephone number, website... etc).
The basic purpose of a form is to collect information from users with a specific goal in mind. It has been an essential part of every inbound marketing and data collection which can eventually be used for conversion from regular …
Form validation is one of the most critical factors when it comes to collecting information and preventing web form misuse. Apart from saving you from possible cyber-attacks, form validation also protects your website from poor form entries. During form submission …
Are you looking to send confirmation emails after a user submits a form on your website?
Confirmation emails can be a great way to let users know that you received their message, and that you’ll be in touch soon.
In this tutorial, we’ll show you how to send confirmation emails to your users after a WordPress form submission (step by step).
Why Set Up Automated Confirmation Emails in WordPress?
Confirmation emails are sent when a user fills out a contact form or another form on your WordPress site.
Sending an automated confirmation email is a nice gesture. Plus, it lets your users know you’ve received their information. This also lets your users double-check their entries to see if any errors were made.
There are a lot of good reasons to set up WordPress form confirmation emails:
Allows you to open a line of communication with your subscribers
Can provide valuable follow-up information, like links and tutorials
Let’s you confirm the email is a real email
Can confirm email newsletter subscription and start an autoresponder sequence
If you’re selling something, this gives you a chance to offer an upsell or cross-sell
The best part is that setting up a WordPress form submit email is easy to do.
Setting Up Confirmation Emails after WordPress Form Submission
For this tutorial, we’ll be using the WPForms plugin to send a WordPress confirmation email. It is the best contact form plugin for WordPress used by over 4 million websites.
If you’re on a budget, you can use the free version called WPForms Lite, which allows you to set up email confirmations.
However, the Pro version will give you access to even more features like conditional logic forms, additional templates, order forms, integration with email marketing tools, and much more.
The first thing you’ll need to do is install and activate the WPForms plugin. For more details on installing a plugin, see our step by step guide on how to install a WordPress plugin.
Once you’ve installed and activated the form builder plugin, you’ll have a new WPForms tab on the left-hand side of your WordPress dashboard.
If you don’t already have a form on your site, then you’ll need to create one. We have a detailed tutorial on how to create a WordPress contact form that you can use as a guide to get started.
Next, it’s time to set up a WordPress confirmation email. This email will send out automatically and lets your users know their form submission was successfully received.
To do this, head over to WPForms » Settings » Notifications.
You’ll notice that email notifications are already on.
If you don’t want to turn on notifications, then you can toggle this option off.
If you want to send an automated confirmation email, then you’ll need to leave this setting turned on.
Next, we’re going to choose who we want our emails to send to by customizing the form fields.
The default setting will use the admin email Smart Tag {admin_email}. This is the email you used to set up up your WordPress blog. This will deliver all form submissions directly to your inbox.
To make sure that form responses also get delivered to your users, you’ll need to add new email address to the email field. This is similar to how blind carbon copy (BCC) works in standard emails.
To do this, simply click on the ‘Show Smart Tags’ option that’s directly to the right of the ‘Send to Email Address’ field.
You need to select ‘Email’ from the drop-down menu.
This tags your user’s email address that they enter into your WordPress form. The plugin will use this email address to send the confirmation email.
Note, that you’ll need a comma between the two Smart Tags.
Next, it’s time to change the subject line of your email.
The default email subject line is “New Entry”. You’ll want to change this to something that makes sense for your user.
For example, if you have a simple contact form, you can change the subject line to something like, “Thanks for Reaching Out!”. Or, if it’s an order confirmation email, “Thank You for Your Order!”.
To change it, delete the existing text that’s in the box beneath ‘Email Subject’ and add your new subject line.
Now, you’re ready to change the email from name.
It makes sense to use your company or website name here.
To do this simply change the text in the ‘From Name’ box.
Next, you have the ‘From Email’ field.
You can leave this as is, and the email will be the same as your admin email.
After that, you’ll want to change the ‘Reply-To’ field, so your users can respond to your automated email.
If you leave this blank, then the email will be the same as the default admin email.
It’s not necessary to change it, but there are some situations where you’ll want the Reply-To email to be different than your standard email address.
For example, if you have a photography website, and you have a form for new clients to request a quote, then you may want these emails to go to a different email address.
The final step is customizing your email message.
In the ‘Message’ box you can write out the email that will send to everyone who submits the form. You can also change the appearance of your plain text emails by adding HTML.
You can also include the {all_fields} Smart Tag which will add on the user-submitted information to the email.
Congratulations, you’ve successfully installed and set up WPForms, added a form to your site, and set up an automated email confirmation message.
WordPress uses PHP to send emails, which can be falsely flagged as spam. If this happens to your emails, then they will never reach your user’s inbox, or they’ll end up in the spam folder.
This is why we recommend everyone use SMTP for sending emails in WordPress. An SMTP plugin adds another level of verification and sends emails via an official mail server.
We recommend using WP Mail SMTP. It perfectly integrates with WPForms and is the best SMTP WordPress plugin.


 Did you know you can receive an SMS notification each time a form is submitted on your WordPress site, eliminating the need for constant email or active website monitoring? If you’ve been searching for a practical method to stay updated on new inquiries from your site visitors, implementing SMS notifications from your contact form is […]


 Most websites need a way for customers, potential clients or regular readers to reach out. You could buy a theme that has a custom contact page built-in, or try to code a contact page yourself, but these options are typically either costly or complicated. You don’t have time for that – which brings us to […]