Forming an LLC is an exciting accomplishment for any entrepreneur or business owner. But the work doesn’t end after the …
A Beginner’s Guide to Maintaining Your LLC Read More »
The post A Beginner’s Guide to Maintaining Your LLC appeared first on .

Tips, Expertise, Articles and Advice from the Pro's for Your Website or Blog to Succeed

Forming an LLC is an exciting accomplishment for any entrepreneur or business owner. But the work doesn’t end after the …
A Beginner’s Guide to Maintaining Your LLC Read More »
The post A Beginner’s Guide to Maintaining Your LLC appeared first on .

PublishPress, makers of the PublishPress and PublishPress Blocks plugins, have adopted the Organize Series plugin from Darren Ethier. Organize Series is a 15-year-old plugin for organizing and displaying posts in a series, useful for novel writers, educators, magazine sites, and anyone breaking their longer content up into a series.

PublishPress is also adopting seven extensions for the plugin that add features like custom post type support, shortcodes, the ability to add a post to multiple series, bulk publishing, and more.
Ethier, who works as an engineer at Automattic, said he began losing interest in maintaining the plugin and knew it was time to search for a new owner.
“Most of you have noticed that I haven’t been actively contributing to Organize Series or it’s extensions for some time now and it’s been bugging me,” he said. “I’ve been gradually losing interest in maintaining the plugin as I’ve expanded my developer horizons and as a result, I’ve struggled with making the time to work on it.”
Ethier connected with PublishPress by describing his situation in a post on the Post Status community and agreed to transfer his plugin and extensions in exchange for a donation to a charity.
“Darren asked us to make a charitable donation as part of the handover,” PublishPress founder Steve Burge said. “We chose the American Journalism Project. Over 2,100 communities in the U.S. have lost their local newspaper since 2004. The AJP is trying to reverse that trend. It is a non-profit that is investing in local news. Their goal is to help grow newsrooms that hold the powerful accountable, combat disinformation, and deepen civic participation.”
Burge assured current users that the free version of Organize Series will remain free on WordPress.org with all of its current features and some improvements. The company will also keep the extensions freely available on GitHub but Burge said they plan to release a commercial version with updated versions of the extensions.
With the adoption of Organize Series, PublishPress now has nine plugins available in its niche collection of publishing extensions as part of its mission to “help WordPress publishers succeed.” In the near future, Organize Series’ website content will be transferred over and the company will be changing the plugin’s name to “PublishPress Series.”

 Unless you are a web professional who is well-acquainted with the WordPress backend, there is no guarantee you would know that you can customize it as per your requirements. Yes, that is right! This practice is called white-labelling, which is basically the process of removing all mentions of WordPress from your backend and modifying it […]
The post Top 6 White Label Branding Plugins For WordPress appeared first on WPExplorer.


Our 5-star free form creating plugin, Forminator, has a few advanced features that you can implement today for your WordPress site.
For example, he has pagination for Knowledge & Personality Quizzes! This allows you to show quiz questions one at a time, or all the questions at once. The pagination feature helps further determine how your quiz will be displayed and used.
Plus, Forminator also has Bulk Editing, image support in Checkbox and Radio fields, and reCAPTCHA badge positioning!

This article will show you pagination support and rundown other features so that you can implement them for your WordPress site today.
We’ll look at:
By the time you read through this, you’ll hopefully have some ideas to put these features immediately to work!
If you want to display several questions for your knowledge quizzes at a time, then you’ll want to use Quiz Pagination. As you’ll see, creating a quiz with pagination is as easy as ever with Forminator.
You’ll start just like usual by making a new quiz. Just hit Create…

…then, give it a Quiz Name. For this example, we’ll create a Knowledge Quiz.

At this point, Forminator will ask you how you want to present your quiz. Since we’re focused on pagination, we’ll choose the Paginated Quiz option and hit Continue.

Once you continue, you’ll also have the option to collect leads. That’s up to you and won’t have any effect on your pagination options.
After creating the quiz, you can set it up like a regular quiz (e.g. adding a title, featured images, etc.). Additionally, add your questions.
If you need help getting a quiz set up in detail, check out our Getting the Most Out of Forminator article to walk you through the process.
I’ve set up some questions and am now ready to edit the pagination (and again, if you need help setting up questions, please refer to this article).
Editing pagination is done from the Behaviour tab.
Once you’re here, you have the option No Pagination or Paginated Quiz. This is so you can remove pagination if you decide not to use it in the future.
For this article, we’re going with Paginated Quiz.

Paginated Quiz then lets you determine the number of questions per page, the Start Quiz Button text, and the text for previous & next buttons. You can also check the box if you want to show a page indicator.
It’s as simple as filling in the details in the spaces provided.

When the pagination details are entered, the rest can be created like any other knowledge quiz. That includes:
Set the quiz up as you feel appropriate, and then you’re on to…
When you have your quiz configured to your standards, click Preview to see what it looks like. Let’s check it out!
I uploaded a cover image and titled it Forms and Superheros, and added a description. This is how the quiz begins…

And here’s a quick walkthrough where I have a correct — and incorrect — answer. Plus, it’ll show me the results. Keep in mind that this is a two-question quiz that I wanted on the same page.
As you can see, Forminator lets you know when you have the answer right or wrong immediately.
When you click View Results, Forminator lets you know exactly how many you got right and wrong. Whew! This was a tough one.

If the preview looks good, like any quiz, hit Publish, and Forminator will deliver a shortcode that can be used on any page, post, or acceptable widget.

And that’s it!
If you need to, you can always edit the quiz at any time through Forminator’s dashboard. Otherwise, your paginated knowledge quiz is ready to go.
Another great advanced editing feature in Forminator is Bulk Editing. Bulk editing lets you add a large number of options at once. This makes the process of editing more streamlined, efficient, and quick.
This feature works with the Radio, Checkbox, and Select fields.

When it comes to bulk editing, you have three options. You can bulk edit:
The process to get this implemented is the same in all of the fields. Bulk Edit is located in the Labels tab in each respective field.
To get started, simply click the Bulk Edit option.
One-click is all it takes to get moving.
Once implementing Bulk Edit, any existing options you have manually created will automatically populate in the Bulk Edit section.

Let’s take a look at each option when it comes to bulk editing.
This option is great if you want to manually enter or paste your list of options into the Bulk Edit area. When doing this, enter them one per line with each term separated by a semicolon in this order:
Or, you can enter Label only. By doing this, Forminator will generate the value automatically and set selected to zero. Plus, it won’t add an image URL.
An example of this might look like this…

Manually entering options is best for adding just several options at a time in bulk.
When you have a ton of options on a CSV file, you can quickly bulk upload these to Forminator.
What if you don’t have a CSV file? Download Forminator’s CSV template. It has a list of examples that you can edit to include your own options.

The example file is fundamental, with just a few pieces of information. Edit however you want, and then click Upload File once you have edited and saved the CSV file. Then, hit Import to add all of your options into the Bulk Edit section.

Keep in mind that uploading will replace any existing options that you have in place.
Forminator has quite a few predefined options you can use in an instant. They’re all available via the dropdown menu.
The dropdown menu has them all.
Choose from the dropdown menu:
Plus, you can add New Option, which will allow you to input your data.
The predefined options make it quick and easy to bulk edit whatever field you’re working in.
There are several more advanced features for Forminator that you may find helpful. These were all included in the release of 1.14.12, and include Image Support for Checkbox & Radio Field, HTML Quiz Description Field, and Setting reCAPTCHA Badge Position.
We’ll quickly check out each one of these and demonstrate how they work.
Forminator now gives you the option to upload an image to the Checkbox and Radio fields. This can help forms become much more visually appealing and easier to set up than uploading an image separately for a form.
Just have a form with the fields in them (if you need help setting up a form, please check out our How to Get the Most Out of Forminator article).
Go into the form field, and you’ll see that under the Labels tab, there’s a checkbox you can click to Enable Images.

Once enabled, you simply go to the Options, click the dropdown by any option you want an image in, and upload a photo.

Once you have your images uploaded, click Apply, and you’re all set! Your images will be included with your Checkbox or Radio field.

You can always edit and adjust your images at any time.
Add descriptions for each individual quiz answer in Forminator’s HTML Quiz Description Field. This feature helps clarify any answer for your users and can help make for a more engaging quiz.
All you do is type it in the Description area in each individual question field.

Once you have the description entered, click Apply. Your description is now added!
This is a fast adjustment that can be made regarding the reCAPTCHA position. It puts you in control of where your reCAPTCHA is displayed.
You just go into your reCAPTCHA field, click Settings, and choose where you want your badge to appear on your site.
Choose from these specific areas:
Once you select where you want your badge to appear, click Apply.
Keep in mind that this only works with V2 Invisible and reCAPTCHA V3 options.
And for even more about using reCAPTCHA, please read our article covering incorporating it with our security plugin, Defender.
If you think features like pagination are sensational, Forminator is constantly adding new beneficial features and enhancements. Be sure to follow our Roadmap to see what’s next!
And now that you know how, implement these advanced features (for free!) and give them a try today.
Happy form building!
Configs eliminate painstaking manual adjustments for individual sites. Instead, you can immediately apply your preferred plugin and uptime settings to unlimited sites with a click!
Best of all, they’re all implemented quickly from The Hub and WordPress admin.
Adjust any config-supported plugin to your preference, save as a new config, apply your custom config to all of your Hub-connected sites in one click — it’s that easy!
This article is your ultimate guide to learn, know, and use configs for your WordPress sites. We’ll be going over:
Once you have configs up and running, you’ll see for yourself how easy and beneficial it is to adjust your settings on unlimited sites.
Plus, with easy config access from The Hub, WordPress management just got better than ever.
Let’s get to it!
Configs are by far one of the most beneficial features you can use to help build and tweak your WordPress sites.
In a nutshell, they allow you to set up any supported plugin to your preference, and then save these (non-unique) plugin settings as a new config – which you can then apply to the rest of your sites in one hit.
Think saving your video game progress, but for WordPress plugins.
You can create new configs in WordPress or The Hub, and they automatically sync across to the each other.
Note that you can also use configs WITHOUT The Hub, you’ll just have to save and upload them to your sites manually – which will still save time – but won’t be as fast as one-click applying them via The Hub.
Currently configs can be used with SmartCrawl, Defender, Smush, Hummingbird, and Uptime (Forminator, Branda, and Automate coming soon!).
Finally, you have the option of using our default configs (which are already set up and optimized by our expert team), or you can create your own custom configs.
We’ll first check out how to use default configs from the WordPress admin.
They’re a great way to get started with configs, especially if you’d prefer to skip the configuration process. Our default options will suit most users and are a great foundation to build from.
In this walkthrough, I’ll be using Defender.
In Defender’s dashboard, you can see that there’s a section labeled Preset Configs.
It shows what’s included (Basic Config and Default Security Config), Manage Options, and Save New.

You can view the details of each one by clicking on the dropdown arrow, showing you what’s activated and what’s not.
Here’s a look at the Basic Config.

From here, it’s a matter of applying or downloading the config. It’s done by clicking the gear icon and Download.
As mentioned earlier, the download option is mainly for non-Hub users who want to still upload their configs to other sites.
By tapping Apply, Defender will make sure you want to proceed and recommends a backup for your site.

If you want to make this config active, hit Apply, and you’re all set!
You can now move to The Hub and apply this same config to all your other sites in bulk, but we’ll get to that soon.
Alright, now that you know how to use default configs, let’s set up a completely customized one.
Creating a custom config is a way to set up plugin configurations to your standards and preference.
It can be done from WordPress or The Hub, and they can be applied to unlimited WordPress sites.
Let’s set one up in WordPress using Defender again.
We’ll start by assuming you’ve already activated relevant Defender settings and tools.
Once you’ve done this it’s as simple as hitting Save New in the Configs section.

When hitting Save New, a new box will appear. This is where you can add a Title and Description of the config.
Then, click Save, and all of the configurations you have saved at this time will be available as a new config.

It will then appear with your other configs, where you can activate, edit name and description, or delete.

The new config is also ready to be activated or downloaded and applied to as many sites as you want.
If you’re in The Hub, you’ll see that this new config is also accessible here. It’s under My Configs.

Speaking of The Hub, now it’s time to see how easy it is to apply configs to unlimited sites with a couple of clicks.
From the My Sites area you should see the Configs tab.

Once you click on Configs, you’ll see you can access either our Default Configs or any custom configs you’ve created in My Configs.
For this example, we’ll show you how to apply a default config, but the process for applying custom configs is exactly the same.

Next, you’ll see the option to Apply to site(s) and an ellipsis by each plugin and service.
To apply this config to your site(s), click Apply to site(s).

Before applying, you can also check out what’s in the config by clicking the ellipsis.
When clicking this, you’ll hit Details, and it shows you all that’s included, so you can make a good decision about what sites you want to apply it to.
For example, here is detailed information about the Performance Config and Hummingbird Pro.
It shows the date it was created, what’s active/inactive, what’s automated, and is broken up into categories (e.g. Advanced Tools).

Like what you see, and you want this config applied to a specific site? Or unlimited sites? You can do that from here by clicking Apply.

After hitting Apply, you’re given the option to add configs for one or numerous sites.
You can do this individually or all at once by tapping Select All.
Choose as many sites as you want to apply configs to.
When hitting Select All, you’ll notice any website with the plugin not active won’t be included.
Plus, it will give you the total amount of sites the config is applied to.

Once you have the sites, you want to apply configs to, hit Apply to site — and you’re all set!
Want more convenience?
Configs can also be enabled directly from The Hub Overview.
Here’s an example of saving or applying an Uptime config.

If you click on the ellipsis, it will open up a dropdown where you have an option to Save Config and Apply Config.

Once you’ve created different configs across different plugins, you can easily add them all to single sites at once using our quick config site setup.
From The Hub, go to a site and click on the ellipsis in the upper-righthand corner.
From there, you’ll see Quick Setup. Click on that to get started.
Your configs are now well on the way.
This brings up a brief guide of configs and gives you the option to Start Setup.
From here, it’s a matter of selecting what you want to set up by checking the box next to the feature.
Any configs that are available (including custom configs), you’ll be able to select from the dropdown where it says Select Config. Select from the dropdown the configs you want to use.

Once you have the DEV configs sorted the way you want, click Start Setup.
It’s just a matter of choosing what configs to apply and where.
And just like that, your configs are attributed to your WordPress site!
Note: We recommend not using configs for brand-spanking new sites. It’s best to get established with your plugins and features first so that any functionality isn’t disrupted (e.g. if you were to enable a Defender config on a brand new site with masked login activated, you will not be able to log into the site).
Our uptime tool allows you to monitor downtime and uptime, configure the notification threshold, and the email recipient who you want to keep tabs on your chosen site.
Uptime configs also work slightly different to our regular plugin configs, and custom uptime configs can be a great tool for agencies or freelancers who manage many websites and want to prioritize them differently.

For example, you can create specific uptime configs especially for clients who have purchased your top tiered plans. In this case, your alerts could be set up to instantly notify your top developers.
On the other hand, for lower paying, less priority sites – you might only have a 10 min downtime alert, which is sent to your intermediate developers.
Then simply save these two unique setups as configs, and apply to relevant sites based on their priority.
That’s the one example anyway. The point is, you can get creative with how you customize this particular config tool, and use it to your advantage.
Like the others, Uptime configs can be found in your default and custom config dashboards.

For more on Uptime, be sure to check out our documentation.
As you can see, configs are a BIG advantage to your WordPress management. They put you in the driver’s seat when it comes to your WordPress sites settings!
Configs streamline everything, so you don’t have to adjust settings for each site that you have. They’re an excellent one-and-done solution.
Be sure to give them a spin today on unlimited sites with our supported plugins and Uptime. If you don’t have The Hub and want to check out all that was covered, sign up for a free 7-day trial. You’ll also get access to all of our award-winning premium plugins, 24-7 support, and more!
Now that you know how to use them, there’s nothing else to configure out.

 You may have heard of one of the most popular mobile apps in the world used by over 1.2 billion people – WeChat – created by the Chinese company Tencent. WeChat is part of daily life in China and is considered a super-app that handles everything from chatting with friends to payments for daily spending, […]
The post WeChat & WordPress: Everything You Need to Know appeared first on WPExplorer.


For a whole year now, the question of when and how the return to work after the end of the pandemic will take place has haunted both managers and ordinary employees.
While vaccine distribution is well underway in some regions, and a recent survey found 79% said their CEOs plan to return employees to the office, teleworking and virtual meetings will not disappear any time soon, or perhaps never.
Returning to the offices will make certain changes both in the physical aspects of work and in the way we communicate with each other. Will meetings in break rooms and parties in the office kitchen still be relevant? Will the balance shift in favor of remote workers as they are better informed than their office counterparts?
In the UK, a recent survey by the CIPD found that 71 percent of employers said: “remote work” either increased employee productivity or had no effect on it. Therefore, according to sociologists of the Institute of Directors, 63 percent of managers plan to allow subordinates to work from home from one to four days a week, and some will even be allowed to independently determine the hours of work.
Nor are they planning to say goodbye to the remote form of work in the United States, where, according to a report from the Upwork platform, in 2021 every fourth resident will work remotely. Therefore, many companies continue to adapt to these realities based on the experience gained over the past year.
For example, Marketing Refresh will minimize the number of working video calls, believing that redundancy is detrimental to performance. According to the Remoters website, many organizations set up "virtual coffee breaks" to maintain a friendly community.
The pandemic has also spawned a completely new phenomenon - the tourist places suffering from the absence of guests literally hunt for remote workers. Hawaii has developed a Movers & Shakas program for out-of-state Americans working remotely. They are offered to come to Hawaii and work for their company from there, while the host party will bear the cost of the flight and guarantee a discount on accommodation in local hotels. In return, program participants will consult local startups in various forms or allocate time for volunteer work. It turns out that such immigrants will spend the money earned in other states in Hawaii, thereby compensating the local tourist business for losses from tourist downtime, and at the same time supporting the local business with their experience.
In France, the "obligation" to work remotely, for violation of which was recently fined up to 15 thousand euros, will soon be over. From June 9, employers will decide for themselves what to do with the "remote".
Small companies, especially startups, have completely adopted this form of work and are not going to give it up. For example, the insurance agency Easyblue plans to work 100% in this mode even after the end of the sanitary crisis. Moreover, some employees intend to move out of town, where life is cheaper and more comfortable. But every quarter, the director will call his subordinates to Paris so that they can communicate with each other for several days.
Indeed, as revealed by a survey of the French Institute for the Study of Public Opinion IFOP, 55 percent of people come to the office not only for work, but also for communication, sometimes informal. This is especially important for young people. According to experts, we should not forget that offices are a space where a connection between employees and the enterprise is created, common ideas are born, motivation increases, and therefore, ultimately, productivity. The pandemic has spawned many ideas for hybrid forms of work - from renting a place for an employee near his home to moving to exotic islands.
This is understood in large corporations, where they tend to a hybrid form of work. For example, the telecom company ALE will offer its employees a mixed option: work in the office a few days a week and the rest at home. Moreover, without any restrictions in one direction or another. According to the head of the personnel department of the company Eric Leschelard, "remote work complicates the management of the company, does not fully understand the mood of people."
Finally, experts believe, the attitude towards the workplace will change. Under the new conditions, it will not be assigned to someone in particular, but will be treated as an ordinary means of production that can be used by any employee who happens to be in the office.

In this case, the main questions that need to be answered are: What to do with tasks that are best made in person, if many employees today prefer to work remotely? How will the division of the workforce affect corporate culture in the long term?
The specific answers to these questions will vary depending on the organization and the situation each CEO faces, but the tips below can help.
1. Leaders should not make final decisions ahead of time. When uncertainty lies ahead, it is important to avoid steps that either create unrealistic expectations or limit the range of available alternatives. The key to success is to gain time to gather more information and to be able to choose for as long as possible.
2. When discussing return-to-work scenarios, leaders should keep their own preferences to themselves. Top-level government officials are taught not to voice their opinions too early to military and intelligence advisers, so as not to affect the quality of the analysis. Likewise, at this stage, CEOs should ask questions and refrain from making statements for as long as possible.
3. Do not overly trust the data obtained through employee surveys. Many companies ask workers how many days a week they want to spend in the office after the pandemic ends, and if they want to at all. Most of the comments boil down to the fact that once it is safe to return to the office, many will prefer to continue to work from home for most of the week. However, opinions often change. What people say after sitting at home for a year may become irrelevant by the fall, especially if by then they have lived several months under relaxed restrictions.
You should also separate the opinions of employees and managers and interview them separately. Many managers say that working remotely is more frustrating than satisfying because their responsibilities include tasks that are very difficult to do remotely.
They need to provide interaction between teams, advise them, resolve issues with employees and problems of relationships between them, and read subtle cues in day-to-day work that indicate communication difficulties. If these tasks are not performed well, morale, team efficiency and ultimately innovation suffer. Managing people remotely is always more difficult. Therefore, managers' opinions on a return to work plan must carry special weight and matter more than those of their subordinates.
4. The size of the company is an important factor in decision-making. A large company, unlike a startup, needs predictability and routine, since the risks and consequences of mistakes are more serious. Large organizations need to rely more on formal politics and a sense of fairness, which limits their ability to make individual decisions that are acceptable to small companies.
5. Do not dwell on the technological problems of remote work. When it comes to decisions related to going out to the office, the main question is not “How can we use technology to increase the efficiency of remote work?”, but “What can't we do well if we go too far in the passion for remote work?” and "What does 'go too far' mean?"
The CEO must take into account the costs of over-reliance on telecommuting. Real teams (unlike nominal ones) cannot be created online. Creativity requires spontaneity and regular, unplanned, sequential action. Loyalty and dedication to a common goal requires people to go through good times and bad times together, shoulder to shoulder. Employees who describe their telecom experiences for a year say discussions have become shorter and more superficial and that there is less time to think and analyze the situation.
6. Do not blindly imitate well-known companies (such as Google, Twitter, Facebook, Adobe and Oracle) that have announced plans to move to permanent remote work. The most active in defense of permanent deletion are those who benefit from it financially, primarily software developers. Remote workers use technology products and social media more than office workers. That is, tech companies are interested in more people working remotely. And it's not always worth taking an example from them when developing your own policy.
Mark Zuckerberg has pledged that by 2030 at least half of Facebook's 50,000 employees will work from home. A few days earlier, Jack Dorsey announced that Twitter and Square employees would be allowed to work "exactly where they feel most creative and productive, even after offices start reopening."
These leading tech companies have spent a lot of time building highly-equipped campuses that are as seamless as possible for talent and ideas to interact to entice their employees to spend as much time in the office as possible. COVID-19 has shown them that their staff can be just as, and in some cases, more efficient by staying at home.
Microsoft CEO Satya Nadella isn't sure about this. A complete rejection of office work for the sake of telecommuting is "replacing one dogma with another," he explained in an interview with The New York Times. “We may be burning some of the social capital that we accumulated at the stage when we were all working remotely. How can this be measured? " Nadella asks.
Remote work is helping companies weather the current crisis, but what do company leaders want from it in the long run? Higher performance? Savings on offices, travel, and salaries for employees living in lower-cost regions? Improving morale and reducing employee turnover?
In fact, more or less active use of remote work is not a point change in a previously stable management system. Working from home is a system in itself, in which there are many interdependencies, both personnel and technological. These include:
The technologies (which you have or need to build) you need to keep your system running, including tools for collaboration, creative challenges, and productivity.
The resources (your physical presence, people, technology tools), rules, practices and processes your system needs to function. These include HR tasks such as staff relocation and development and remuneration, operational issues such as office design, and logistical challenges such as creating temporary jobs for remote workers when they need to work in the office.
The rules, regulations and key metrics you will need to implement, maintain and improve your culture and values.
You can model this system to some extent, but its characteristics will have to be revised after they come into contact with reality. Do not expect the system to start successfully the first time.
It’s more than a year since most offices closed due to the COVID-19 pandemic. Now, there is a reason to expect that the pandemic will be over soon. That’s why so many companies are beginning to seriously consider returning to the offices.
Return to the office, stay remote, or incorporate a hybrid model - all require thinking of the employees and what will be the most effective, convenient, and safe way to fulfill their tasks. Global pandemic showed us that people can be flexible and transform the traditional notion of the workplace into a modern and productive solution.
If you're looking for a software developers team that will be perfectly matched with your industry, technology, team dynamics, and company culture - contact us so we can answer all of your questions.

This post is originally published on Designmodo: How to Quickly Deploy a Static Website Online with Static.app

In recent years, static websites have gone from simple layout pages to becoming a widely used ecosystem to power-up robust SEO-friendly and lightning fast websites. Because of the wide range of benefits it offers, static websites are now used to …
For more information please contact Designmodo

Joshua Comeau digs into how styled-components works by re-building the basics. A fun and useful journey.
styled-components seems like the biggest player in the CSS-in-React market. Despite being in that world, I haven’t yet been fully compelled by it. I’m a big fan of the basics: scoped styles by way of unique class names. I also like that it works with hot module reloading as it all happens in JavaScript. But I get those through css-modules, and I like the file-separation and Sass support I get through css-modules. There are a few things I’m starting to come around on though (a little):
.root or whatever. With styled-components you attach the styles right to the component and don’t really name anything.Direct Link to Article — Permalink
The post Demystifying styled-components appeared first on CSS-Tricks. You can support CSS-Tricks by being an MVP Supporter.

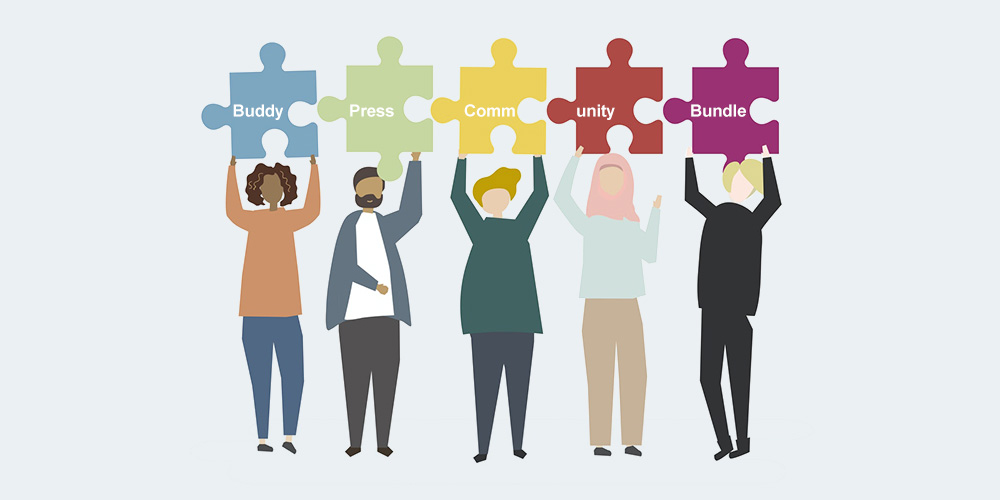 Do you run a WordPress community site on BuddyPress? Are you looking to create the best social network on BuddyPress? If so, you’re in the right place. BuddyPress is one of the best community plugins for WordPress. It’s a great solution for social networks, intranets, online communities, teams, and groups. The platform is powerful but […]
The post Build a Social Network with the BuddyPress Community Bundle appeared first on WPExplorer.
Entrepreneurs and business owners usually know what type of products or services they’re going to offer and who they’re going …
How to Define Your Company’s Identity in 3 Simple Steps Read More »
The post How to Define Your Company’s Identity in 3 Simple Steps appeared first on .
Today, any beginner can make a website in a few hours. In this, one is often helped by unique systems for creating and managing websites. WordPress has been one of the most popular for many...
The post Six Tips for First-Time WordPress Users appeared first on 85ideas.com.
Business in the 21st century has been accelerated, amplified, and improved by outsourcing, though plenty of skeptics and critics remain. Of course, there are right and wrong ways to go about outsourcing, which often depends...
The post Top Reasons for Outsourcing appeared first on 85ideas.com.
This post is originally published on Designmodo: 7 Awesome Multipurpose WordPress Themes for Your 2021 Projects

You may be hesitant to choose a particular WordPress theme because you are not entirely sure of your own requirements. Or, you haven’t been able to come across a specialty theme that quite fills the bill. In either case you …
For more information please contact Designmodo
Here’s a really good ol’ post from way back in 2015 all about the nine states of design and how we should think all the edge cases whenever we’re building interfaces. Vince Speelman writes:
Modern UI teams are designing components first; Interfaces are merely the thoughtful composition of components. This leaves an often glaring hole for users on “the unhappy path” — The places where users may, intentionally or not, stray from your idealized flow. As we learn to craft systems rather than pages, we must invest effort into shaping these often missed states of design and create with a component lifecycle that can support everyone. Here’s the lifecycle as I see it:
- Nothing state
- Loading
- None
- One
- Some
- Too many
- Incorrect
- Correct
- Done
During the design process I think everyone (including me!) tends to focus on the ideal state of a component or interface, often leaving the extremely important edge cases forgotten until the last moment. I think I need to stick this list to my screen so I don’t forget it in my next project.
Direct Link to Article — Permalink
The post The Nine States of Design appeared first on CSS-Tricks. You can support CSS-Tricks by being an MVP Supporter.

 It takes a lot of work to set up an eye-catching and user-friendly website, so it can be disheartening to see it fall into the wrong hands because of a failure to provide proper security measures. The first sign of trouble may be when you get multiple alerts that someone is trying to access your […]
The post How To Handle Multiple Failed Login Attempts for WordPress appeared first on WPExplorer.
Effi, an Australian mortgage broking platform, has launched a new Product Search API that will provide access to home loan product data spanning offerings from over 100 lenders. The new API aims to meet the demand created by recent open banking legislation that has been enacted in the country.