I tried using this code(below) to change the button text when i run the code from "Button1" to "Click" but when i run the code the name still remains "Button1" and if i click the button the name then changes to "Click". I want the code to show "Click" on the button when i run it not when i click it. Please, how do i do this? And would it work for other tools like label?
Public Class Form1
Private Sub Button1_Click(sender As Object, e As EventArgs) Handles Button1.Click
    Button1.Text = "Click"

End Sub
I have a question regarding on disabling today date on datepicker, i got this code from internet and it seem like working , but then i realised its starting disable today date from 08:00 am onward and not disable from 12:00 am, seems like its has problem with time zone, i guess.
I simply do not understand it. For at least the better part of a decade, theme authors have asked for the tools to create more complex layouts with WordPress. They have asked for the ability to allow end-users to more easily recreate their demos. They have wanted methods to bypass the “restrictive” theme review guidelines.
Over the past couple of years, WordPress has consistently delivered features that theme authors have asked for. Yet, themes that use them are few and far between.
During my weekly perusal of the latest themes to land in the directory, a new wedding theme caught my attention last week. Of course, I downloaded, installed, and activated it only to find that I had no idea how to recreate the homepage design. There were no instructions. The theme options in the customizer seemed to make little sense. Nearly all of the decorative images were non-existent in the theme folder.
Did I need to upgrade to the pro version to get what was in the screenshot? There seems to be a plan for such a version, but it is not available yet.
Classic Wedding theme screenshot.
I am no rookie, but I was stuck. I liked the simplicity of the design. However, I could not imagine setting up a wedding site with this theme. From a user’s standpoint, it should not take more than a few mouse clicks. After that point, it should only be a matter of customizing the content.
I recognize that there is still a sort of love/hate divide for the block editor in the inner WordPress community. However, theme authors are not doing any favors for the overall WordPress user base by not taking advantage of the tools available.
So, I recreated the Classic Wedding theme homepage from scratch. Using the block editor. With a theme that supports it.
Creating a Wedding Homepage
My goal was simple. There was no demo to work from, and all I had to go on was an 800-pixel wide screenshot from the theme page on the author’s site. Like I recreated the Music Artist homepage several weeks ago, I wanted to do the same for Classic Wedding. With a couple of exceptions, which could have been handled by the theme, I was successful.
Because Classic Wedding does not support the block editor itself, I could not recreate its homepage via the block editor while using the theme. It was not happening — I tried. I knew that the Eksell WordPress theme had a “canvas” template that allowed users to edit the entire page, so it was an easy choice.
I also loaded the Kaushan Script and Lora fonts to more closely match the original theme. This was unnecessary for the experiment, but I wanted my recreation to at least look somewhat similar.
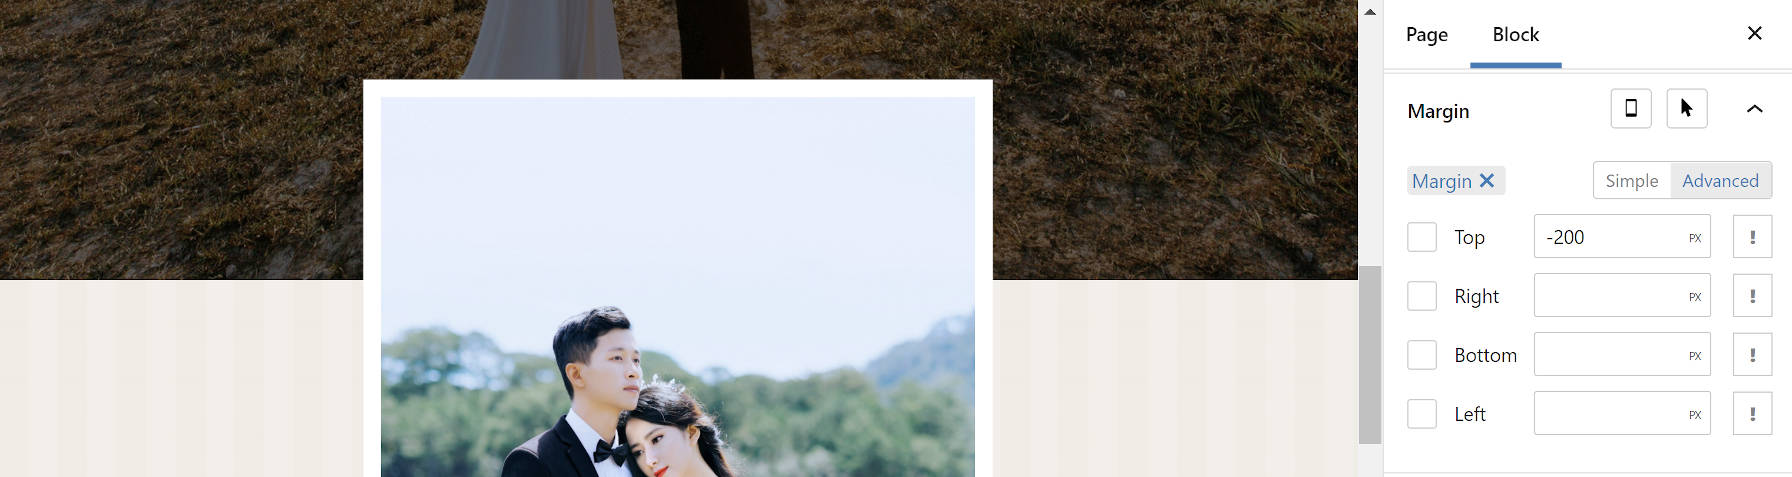
I immediately knew that I would have one hurdle to overcome. The theme used an image that overlapped both the section above and below it. This requires margin controls, particularly the ability to add negative margins. Unfortunately, this is a missing component of the block editor today. It does not mean that theme authors cannot do it with custom block styles or patterns. It simply means that end-users are unable to control it from the interface.
Because I did not want to spend my time writing the code for this, I leaned on my usual safety net, the Editor Plus plugin. While it can be a little clunky sometimes and feel like overkill, it does include those missing features like margin options.
Adding negative margin to an image.
I used px units there because it was easy. In a real-world project, % or rem would have been better. But I was just doing a quick proof-of-concept.
Everything else in the content area was straightforward. I needed a Cover block with an Image, Heading, Paragraph, and Button tucked inside. I needed a Group block as a container for Image, Heading, and Paragraphs in the bottom section.
Because the theme did not package its decorative images — again, how would users recreate the homepage without them? — I opted for a simple striped SVG background instead of the flowers in the original. Since I already had Editor Plus installed, I added an SVG from Hero Icons as the main background.
Wedding page content recreation.
My original idea was to recreate the “content” part of the homepage only. However, it was a bit boring on its own. Therefore, I transformed everything into a Columns block and added the sidebar. I recreated the primary elements using the Image, Heading, Paragraph, and Navigation blocks. Then, I added a Social Icons block for fun.
Full wedding homepage design.
I did hit one snag with the Navigation block. WordPress does not currently offer a method of centering each link in the list when using the vertical block variation. I had to write a couple of lines of CSS to make this happen. This seems like an oversight and one area where the block editor failed to meet my expectations. Of course, this could be handled on the theme side of things.
Overall, this was a relatively simple project. However, this experiment added some complexities that were not present when I recreated the Music Artist homepage. Margin controls and vertical Navigation block alignments are must-haves. Using a third-party plugin and writing custom CSS is not ideal, and these were requirements to make this happen straight from the editor.
All of this is possible from the theme end. Each piece of this design could have been packaged as a block pattern. The overlapping image effect would have made for a neat block style. I just wish that theme authors would start utilizing the features that are being hand-fed to them.
When there is CSS available for a page, whether it’s inline or an external stylesheet, the browser delays rendering until the CSS is parsed. This is because pages without CSS are often unusable.
The browser has to wait until the CSS is both downloaded and parsed to show us that first rendering of the page, otherwise browsing the web would be a terribly visually jerky to browse. We’d probably write JavaScript to delay page rendering on purpose if that’s how the native web worked.
So how do you improve it? The classics like caching, minification, and compression help. But also, shipping less of it, and only loading the bit you need and the rest after the first render.
It’s entirely about how and how much CSS you load, and has very little to do with the contents of the the CSS.
Are you trying to point multiple domains to a single WordPress installation? Do you want to display unique content for each domain and have it all easily managed in one site? Domain mapping is the solution! Many people looking for a solution like this don’t often know what to call it, so here are a […]


 Are you trying to point multiple domains to a single WordPress installation? Do you want to display unique content for each domain and have it all easily managed in one site? Domain mapping is the solution! Many people looking for a solution like this don’t often know what to call it, so here are a […]