An error occurring while operating a WordPress theme or site is not something unusual. However, getting them fixed and back to working can be a tedious and time-consuming task. It often eats up your working...
The Google Ads API has been moving quickly toward general availability over the past year, with the company committed to moving past beta as rapidly as possible. Version 5.0 of the API was announced in beta less than a month ago on August 26th, this followed quickly after version 4.0 was announced in July.
Looking for WordPress hosting recommendations online is a bit tough. Sure, you will find loads of reviews from various publishers – including us – but how can you know which of the hosts go beyond that initial positive impression and deliver good experience long term? That’s the kind of stuff you can only learn from actual users and website owners. This is where our WordPress hosting survey comes into play!
If you want to grow a successful business, you should definitely spend some time thinking about your email marketing strategy. After all, growing and nurturing an email list with an engaged audience is crucial when it comes to selling your services or products. While there is no shortage of email marketing providers out there, the […]
Colors have mood-altering effects and there’s no doubt that the shade you choose to paint your living room or the hue of your t-shirt can brighten your mood. Each year there are certain colors...
There are many facets that go into the leading API portals and ProgrammableWeb has created a series of articles that help you understand what best practices are being used by real-world API providers.
Hey guys,
I apologize if there is a similar topic in the forum but I couldn't find anything so I'm opening a new topic.
Has anyone worked with Zmatic? A friend of mine recommended them for having quality affiliate traffic but I want to check them out before jumping on the bandwagon - zmatic.eu
With The Hub 2.0, you can give unlimited users multiple roles — even if they aren’t WPMU DEV members! All of this can be easily set up in a matter of minutes, allowing you the flexibility to give users access to as much or as little as you’d like on your WordPress site.
Plus, With The Hub Client, you can create your Hub for your clients and collaborators, using your branding.
Oh, and did we mention it’s all free for your users and you’re able to be set up in minutes?
This post’s features are accomplished from the Users & Roles tab in The Hub dashboard, except for The Hub Client, accessed by the Hub Client Plugin (which I’ll show you how to activate).
1. Easily Set Up Users
You can create new users in The Hub, allowing them to access specific areas on your WordPress site. Creating new users in The Hub is the easiest way to allow access to users because everything is done from one place.
Click the Users tab and Add First User to get started.
Creating new users is perfect for collaborations with other users.
From here, you’ll enter their email. Then, you can select sites that they’ll have access to (all the sites that you have with WPMU DEV are shown in the dropdown), and the user role to view, edit, or custom role (which can be modified and changed at any time).
Clicking on Invite will notify the new user with a confirmation email.
Once that user gets the email and hits Confirm, the user will be redirected to WPMU DEV to set up a free account with their email, name, and password.
They don’t even need to be a WPMU DEV member. And again, there’s no cost for the users. The only cost would be if the new user wants to upgrade to a WPMU DEV membership of their own.
There are only three fields to fill out for a new user to get set up.
When they click Join – that’s it!
A new user is added and will have access to the sites and roles determined by the admin when invited.
From the admin point of view, they can then see their new user in the Users area. If the invited user accepts, it will show Active in the status. If the user hasn’t confirmed yet, it will show Pending.
All your users are shown in one spot in The Hub.
It also displays the user’s email, role, sites that the user has access to, and status.
Add as many users as you’d like by clicking on the New User button.
Setting up a user can be done with the tap of a button.
As you can see, creating and organizing users takes no time at all.
2. Setting Up Roles in Just a Few Clicks
When you send a person an invite to be part of the team, you also add user roles. Roles are what determines which access capabilities users have.
The predetermined roles that are initially available are:
View & Edit
View Only
You can pick between these two or create your own.
Create your own role under Roles by clicking on New custom user role.
All the available roles will be displayed here.
Name the new role anything you’d like and customize accordingly. Let’s check out how to customize it by…
3. Adding User Customization Settings
Customizing access for a role can be determined by clicking on all the available options (e.g. sites, security settings, SEO, etc). Also, choose to have View & Edit or View Only for sites.
You decide what to include in this new role.
The Custom option gives you detailed task descriptions about specific roles that each option can allow.
As an example, here are various tasks you can include for Plugins in this new role. Click on the options you want the user to have the capability to manage.
Allow this role to uninstall plugins, activate plugins, and more.
Once you have the new tasks determine, click Save, and you’re all set.
With roles determined, the ability to assign them is all in one place. Everything under Role shows what that user has access to.
As you can see, the current role is View & Edit – All.
Want to change roles? Customize what sites they have access to and switch roles accordingly by clicking on the roles and what sites you want the user to have access to.
Once updated, the user will have the roles that you applied to them.
And like all things in The Hub, you can edit anything whenever you want.
4. Gain Quick Access to Sites
You have instant access to view your sites and how many users each site has in the Sites tab. The Sites tab makes it quick and easy to view and edit roles for specific sites.
All the websites are displayed here with the number of users displayed next to the site’s name.
You can also click the arrow to sort by name or number.
Hover over the number to bring up all the users for that site.
For this site, there’s one user and one role.
Click on the plus sign by the site’s name to manage the user’s access.
Clicking the plus site will lead you to edit a user’s access.
This shows who has access and whether they’re active or not. Uncheck the user to remove access and add a new user from here, too.
Want to remove access for someone? Click on the green checkmark and that user won’t be able to access any longer.
You can also resend an invitation to a pending user from this section.
5. Set Up The Hub Client
The Hub Client has arrived so that you can personalize The Hub the way you want it.
With The Hub Client, you can provide access to clients, collaborators, and users using your personalized white label Hub. It’s your own Hub, the way you and your organization want it, customized to your perfection.
To use The Hub Client plugin, you have to be connected with The Hub to access its API. You can see how to do that here.
When connected to The Hub, the Hub Client plugin can be downloaded from the White Label page and then clicking on Find out more about The Hub Client.
One-click on White Label, and you’re there.
Once downloaded and installed, you’ll get a welcome message.
Welcome to the Hub Client!
The welcome message can walk you through everything on getting started by, you guessed it – clicking Get Started.
Begin by changing your name to replace WPMU DEV by clicking on the title and entering whatever you’d like.
We’ll just call this one Dev Man.
Replace the WPMU DEV logo with your own by uploading an image in the Your Logo section (e.g. Dev Man).
A cartoon Dev Man will do for this example.
You can change the colors for the Navigation background, Navigation text, and Navigation text selected & hover in the Color scheme area. Do this by visually picking the colors or by color number (e.g. #FFFFFF for white).
Pick and choose appropriate colors that fit your branding.
Head over to the Configuration to select a pre-made menu to appear after Sites.
Configure the menu how you’d like.
And for the client page, you can set up any page you’d like to replace your client hub. All the pages you have in your WordPress site will appear in the dropdown menu.
Choose a specific page to replace ‘hub.’
For example, I created a page called Client Login that I’m going to use for my clients to log in at.
We’ll use this page as an example.
And now, when your users log in, they’ll be greeted with your branding, colors, and configurations.
What the user login area now looks like.
That’s how you have your own completely white-labeled Hub Client organization (yippee!).
So, let’s set up…
6. Users & Roles & The Hub Client
Your colleagues, users, and clients can now log in and use your very own branded WordPress site and customized Hub with The Hub Client. The Hub Client includes controlling all user access levels and roles.
It has to be activated and running to do this, so be sure to read through the section in this article on setting up The Hub Client first.
Once The Hub Client is ready, adding, and setting up users & roles is all accessible in The Hub Client > Users & Roles.
All of your users will be displayed instantly.
This section is precisely how Users & Roles are set up in The Hub, except the Setting tab.
The Hub has the Settings tab, and The Hub Client has a Terms of Service & Privacy tab, so you can edit and set your Terms of Service and Privacy Policy.
You can easily add a new client or user by clicking the New User box.
Add as many new users as you’d like.
Once clicking on that, you’ll fill out the new user’s email address, grant site access, and select the user’s role.
Three simple steps will get a new user set up.
The user will get an email invitation to join. Once confirmed, they’ll appear in your Users & Roles admin as active.
When you have your users in the system, you can manage their access to websites. All you do is click on the individual, and a pop-up will appear where you can select Access to Selected Websites or Access All Websites.
If you choose Access to Selected Websites, you can remove or add sites that the individual can access in one-click.
The blue checkmark means the user can access it.
Create a new role in the Roles tab. Plus, see what User Roles are already set up. (For more on New Roles, please see the Add User Customization Settings).
Have a new role you want to create? Get one set up in a minute or less.
To quickly view your websites, view users for each site, and add or remove users from your site, go to Sites.
Click on a number to view the users for a particular site.
With the Users & Roles in the Hub Client, you’ll have your clients up-and-running in your white-labeled Hub in minutes. All accessible right from the dashboard in your WordPress site.
You can add an unlimited amount of collaborators and users with access to WPMU DEV products, plugins, and support.
There is No Sub for The Hub
As you can see, adding users & roles and creating your Hub for you and your clients is doable in just a few clicks. There’s just no other substitute out there for an all-in-one CMS when it comes to managing your WordPress sites.
And if you think this is good, just wait. Coming soon, we’re including automated site creation & client billing, making your white label Hub your own SaaS business!
GitHub CLI 1.0 is now generally available. The goal of GitHub CLI is to bring GitHub to the terminal. It has been in beta release since earlier this year, and developers have tested it to the tune of 250,000 pull requests.
Mobile e-commerce has experienced a meteoric rise these last few years. And according to recent data, experts predict that the vast majority of online sales will be made through smartphones by 2021. Specifically, it’s believed that 72.9% of e-commerce revenue …
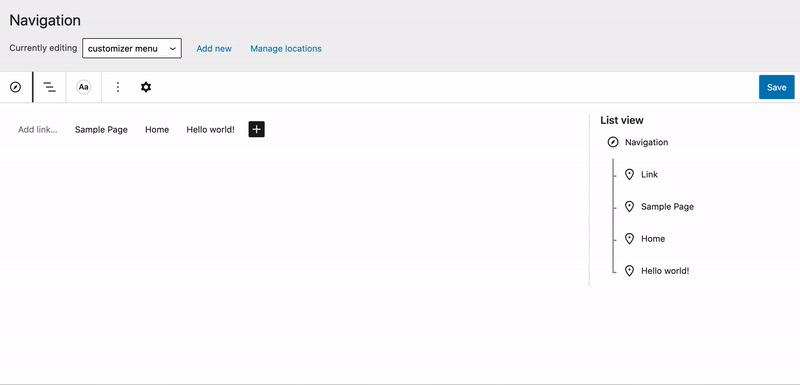
If you haven’t played around with Gutenberg’s experiments lately, the Navigation block is getting some exciting updates. Version 9.0 was released today with drag-and-drop support added to the list view of navigation items.
Manage Locations has been rewritten and is now a popover.
Add New form has been rewritten and now appears inline in the toolbar.
Automatically Add Pages checkbox and Delete menu button has been rewritten and now appears in the block inspector.
The screen is starting to take shape but is still very much a work in progress. If you want to test it, you can enable it under Gutenberg > Experiments.
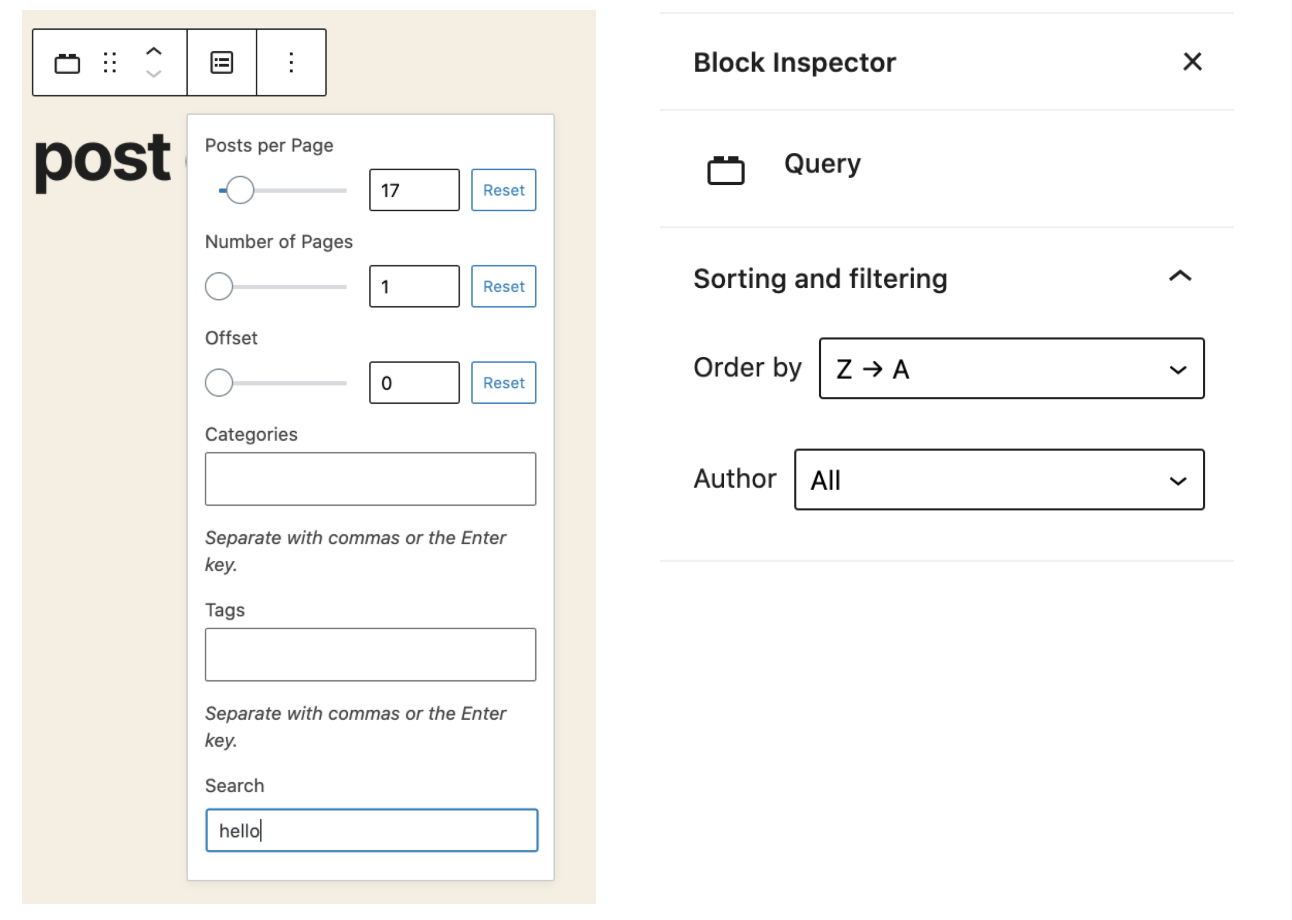
The Query block was another main focus fr the 9.0 release. It is taking a giant leap forward with new features like search, filtering by author, support for order/order by (date + title), and tags. This block should be tested locally and is still behind the __experimentalEnableFullSiteEditing flag since it requires full site editing blocks to display queried content.
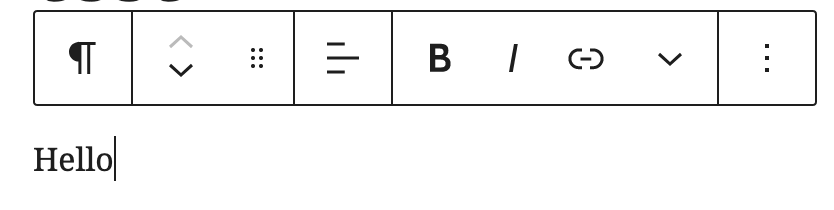
Other notable UI enhancements include a new drag handle added to block toolbar for drag-and-drop capability. (It is not visible on the top toolbar). Blocks can be dragged to other areas of a post as an alternative to using the up/down arrows.
At Treehouse, we value empowerment through education. That includes sharing resources that can benefit our clients—like how to get your business M/WBE certified, and offering support to those who have that certification. While we already work with many businesses, large...
Do you need to edit the footer area of your WordPress website? The footer area appears at the bottom of each page on your WordPress site.,
There are several different ways website owners can utilize this area and make it more useful for their website visitors.
In this article, we will show you how to edit the footer in WordPress.
What is the Footer in WordPress?
The ‘footer’ in WordPress is the bottom part of your website that appears after the content area. It normally appears on all pages on your website.
This part of the website is located far down below and is often ignored by most beginners for a long time. However, there are several ways you can utilize this area by making it more helpful for your users, WordPress SEO, and your business.
All top WordPress themes come with footer widget area that’s easy to edit. You can also carefully edit the footer.php template file in your theme to remove unwanted links from this area.
That being said, let’s take a look at how to easily edit the footer in WordPress. You can use the following links to jump to the section you want to read.
You can use these widget areas to add text, images, or links to your privacy policy and legal disclaimers in the footer area.
Adding text and images is quite straight forward. You can simply go to the Appearance » Widgets page and add a Text, Image, or Gallery widget to your footer widget area.
Note that many themes will have multiple footer areas, and they may use them differently. You can preview your website after adding widgets to make sure that they appear where you want them to be.
Adding Links in Footer Widget Area
You may also want to add links to different pages, categories, or to the legal pages of your website in the footer area.
WordPress comes with an easy to to manage those links using the navigation menus. Simply head over to the Appearance » Menus page and click on the ‘create new menu’ link.
WordPress will ask you to provide a name for your new menu. Enter a name that helps you easily identify this menu and then click on the ‘Create Menu’ button.
Your menu is now ready and you can start adding links to it. Simply select the pages, posts, categories from the left column to add them to your menu.
Once you are finished, click on the Save Menu button to store your changes. For more help, see our article on how to create navigation menus in WordPress.
Your menu is now ready to be added to the WordPress footer widget area. Simply visit the Appearance » Widgets page in your WordPress admin and then add the Navigation Menu widget to your footer area.
In the widget settings, select the footer navigation menu you created earlier from the dropdown menu and click on the Save button.
You can now visit your website to see your footer links in action.
You can create multiple navigation menus in WordPress and add as many navigation menu widgets to your sidebar as you need. If you need another set of links simply repeat the same steps again.
Removing the ‘Powered by WordPress’ Text from Your Footer
When you first install WordPress, your site may have a ‘Powered by WordPress’ link in a footer bar at the bottom. This isn’t a widget, so it’s often not clear how to change it.
Some themes will alter this to their own text and link. If so, you can normally change this text using the live theme customizer. Simply go to Themes » Customizer in your WordPress admin. Look for an option to edit your site footer:
We’re using the Astra theme for this example. With Astra, you need to go to Footer » Footer Bar in the customizer. You will then have the option to change the text of your footer bar:
Once you’ve finished editing the text, don’t forget to click the Publish button at the top of the screen to put your changes live.
Go ahead and view your site to see your new footer:
What if your theme doesn’t have the option to edit the footer text using the customizer?
In this case, you need to edit the footer.php file. It is a template file stored in your WordPress theme folder and is responsible for displaying the footer area for that particular theme.
Then, simply delete or change that text, and reupload your footer.php file.
Tip: Make a copy of your footer.php file before making changes. That way, if you accidentally break anything, you can easily upload the original file again.
Sometimes, you may need to add code snippets to your WordPress footer. This is often done in order to connect your site with an external app.
For instance, to add a Pinterest button to your site, you need to add Pinterest’s script to your footer. You may also see a tutorial that asks you to insert your Google Analytics code there.
Upon activation, simply go to Settings » Insert Headers and Footers in your WordPress admin. Go ahead and copy and paste your footer code into the ‘Scripts in Footer’ box:
Don’t forget to click the Save button before moving on.


 Looking for WordPress hosting recommendations online is a bit tough. Sure, you will find loads of reviews from various publishers – including us – but how can you know which of the hosts go beyond that initial positive impression and deliver good experience long term? That’s the kind of stuff you can only learn from actual users and website owners. This is where our WordPress hosting survey comes into play!
 If you want to grow a successful business, you should definitely spend some time thinking about your email marketing strategy. After all, growing and nurturing an email list with an engaged audience is crucial when it comes to selling your services or products. While there is no shortage of email marketing providers out there, the […]