Read how the Treehouse team designed, built, and deployed an all-new website. Learn about the design process and new features!
The post How We Designed and Built the New Treehouse Website appeared first on Treehouse Blog.

Tips, Expertise, Articles and Advice from the Pro's for Your Website or Blog to Succeed

Read how the Treehouse team designed, built, and deployed an all-new website. Learn about the design process and new features!
The post How We Designed and Built the New Treehouse Website appeared first on Treehouse Blog.

Una doing an amazing job of showing just how (dare I say it?) easy CSS layout has gotten. There is plenty to learn, but what you learn makes sense, and once you have, it’s quite empowering.
The demos are all together here.
Direct Link to Article — Permalink
The post 10 modern layouts in 1 line of CSS appeared first on CSS-Tricks.
You can support CSS-Tricks by being an MVP Supporter.

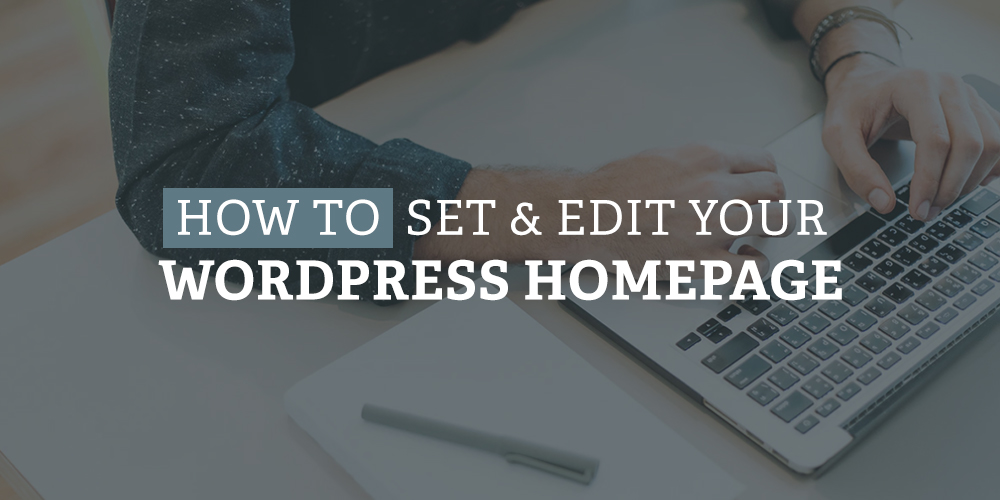 Have you ever bought a WordPress theme, installed it, then wondered why it doesn’t look exactly the way you saw it in the preview? What about a situation where you’d like to completely remove the blog portion of your website from the homepage? Website homepages mean a lot when it comes to conversions. This goes […]
The post How to Set and Edit Your WordPress Homepage appeared first on WPExplorer.
Photo by Caozzy Lin on Unsplash
While Regex is wonderful, it can also be difficult to evaluate properly. Poor regex patterns result in mediocre performance incorrect results. But, is it more dangerous than that? Can it also result in vulnerabilities?

Hi there,
Not sure if I am in the right place, but I wanted to ask where I can access a csv file for all the streets in Belgium?

Now Backpage is Shutdown from few years, but it was a great place to advertise and make some money online. Is There Any Good Alternatives For Advertising
What do you think of the possibility that GMB could become paid?
 Stuck on how to change product price, title, or any other property of a large number of products? This guide intends to provide a solution to this problem with different bulk edit plugins. Up to a limited number of products and limited product properties, we can update it by WooCommerce’s bulk edit option itself, isn’t […]
The post How to Bulk Edit WooCommerce Products appeared first on WPExplorer.

Book updates! New versions of all books including Digging Into WordPress now available for download. As always, updates are FREE for all book owners :)
Direct link to article | View post at DigWP.com

If you are a blogger or an affiliate marketer or a site owner that is looking for a content planning system that can streamline their site content, then you are reading the right review. Source: PublishPress website Introducing PublishPress Plugins PublishPress is a great plugin for WordPress teams to easily manage the workflow and organize content […]
The post PublishPress Review – Content Planning System Every Blogger Needs appeared first on WPArena.

Hi!
Recently I have decided to change my website from Fred's Fashion Boutique to Fred's Fashion (because the URL became available) and I was in the process of a redesign so I thought it would be a good time.
My website is only about 3 months old so wasn't receiving a lot of organic traffic (around 20 a month) but it was on the rise. I was wondering what I need to do in order for my organic traffic to not halt completely.
Also, I had a few backlinks to my website and was wondering if I created a permanent redirect whether the backlinks would be redirected to my new URL which would give it some authority?
I'm still fairly new at SEO and all that so any general tips that you think would help me my SEO for my website would be much appreciated! Also, I am wondering what is the best way to build backlinks and general tips in getting a good domain authority.

This is a neat interactive page by Ville V. Vanninen to reference the names of things in the CSS syntax. I feel like the easy ones to remember are “selector,” “property,” and “value,” but even as a person who writes about CSS a lot, I forget some of the others. Like the property and value together (with the colon) is called a declaration. And all the declarations together, including the curly brackets (but not the selector)? That’s a declaration block, which is slightly more specific than a block, because a block might be inside an at-rule and thus contain other complete rule-sets.
Direct Link to Article — Permalink
The post CSS Vocabulary appeared first on CSS-Tricks.
You can support CSS-Tricks by being an MVP Supporter.
I am new to this site. Can someone please tell me what is the difference between paid and unpaid SEO? Thanks in Advance

                    function username_exists($username){
                        global $db;
                        $sql = "SELECT 'username' FROM users WHERE 'username' = '$username'";
                        $result = mysqli_query($db, $sql);
                        confirmquery( $result );

                         if (mysqli_num_rows($result) > 0) {
                           return true;
                         }else {
                           return false;
                         }
                    }
                    if(username_exists($username)){
                            $error['username'] = 'Username already exists';
}Mode, a digital banking app, is launching its first open banking feature. The feature allows users to connect external banking accounts with the Mode app, specifically enabling quick top ups. The feature is made possible through its partnership with Modulr.
                        function username_exists($username){
                            global $db;
                            $sql = "SELECT 'username' FROM users WHERE 'username' = '$username'";
                            $result = mysqli_query($db, $sql);
                            confirmquery( $result );

                             if (mysqli_num_rows($result) > 0) {
                               return true;
                             }else {
                               return false;
                             }
                        }
                        if(username_exists($username)){
                                $error['username'] = 'Username already exists';
                              }
Hackers can be persistent at trying to get into your site and drop malicious code, figuring out your credentials, and leaving spam. Thankfully, with WPMU DEV’s 5-star security plugin, Defender, you can set up a firewall, block IP addresses with customized lists, and more…leaving troublemakers unable to take even the first step into your WordPress site.
This tutorial will demonstrate how easy it is to set up Defender’s IP banning and keep your WordPress site safe.
Here are 8 areas we’ll be covering (jump to a specific topic by clicking on it):
Most areas of this tutorial are accessible in Defender under the Firewall and IP Banning section unless specified differently.
Let’s get started with the best and most powerful feature of Defender’s firewall…
Defender automatically identifies bad acting IP addresses and adds them to a firewall, providing your site with ongoing security and protection.
You can lock out users who attempt a number of failed login attempts. Defender gives you control over the threshold and duration of the lockout in the Login Protection screen (Defender > Firewall > Login Protection).

You can view how many IP addresses have been temporarily blocked in the Active Lockouts section of the IP Banning screen (Defender > Firewall > IP Banning > Active Lockouts). You can also unblock IP addresses here.

You can also enable 404 detection (Defender > Firewall > 404 Detection), and Defender will automatically block IP addresses that repeatedly request pages on your website that don’t exist. It will also temporarily block these offending IP addresses from accessing your site.

Tip: You can use the 404 detection feature in combination with Defender’s login masking feature to immediately identify and block IP addresses requesting your site’s login page.
In addition to Defender’s automatic IP blocking features, you can also block IPs manually, as the next section explains.
Creating a custom blocklist & allowlist with Defender will keep unwanted IPs from accessing your site.
It’s done by easily entering any IP addresses. This includes admins, too.
The first area is for your Blocklist.

You can type out any IPs you want to be blocked, and they’ll no longer be able to access your site.
When you scroll down a bit further, you’ll have the option to add IP addresses to your Allowlist.

It’s the same as the blocklist, where you just enter the IP addresses that you’d like to always have access to your WordPress site.
IPv4 and IPv6 are both supported for the blocklist and allowlist.
Note: We recommend adding your own IP to avoid getting locked out by accident. Your current IP address will be shown below the allowlist and you can easily copy and paste it in.
When you have all the information added to the blocklist and allowlist, there’s a Save Changes button at the bottom of the screen that will save everything.
Unwanted IPs are no longer going to be stopping by your WordPress site.
You can easily view any IP addresses that are blocked from accessing your site based on your rules.

Once you start having lockouts, they’ll all be compiled here. You can see how many IP addresses are currently blocked.
And if you need to unblock any IPs, there’s…
Sometimes an IP is blocked or banned and you need to unblock it for many reasons.
Defender makes it simple to release any IP addresses from the Active Lockout area by hitting the Unlock IPS button.

This will reveal all of the blocked IP addresses and it’s one-click to unblock them by clicking Unblock.

There’s no need to hit anything further after this. It will unblock the IP and you’re all set.
You can also search for specific IPs in the search area if you’re having difficulty locating them on the list.
Along with IP addresses, you can also ban entire countries with Defender. This feature is handy when you don’t want or expect traffic from specific locations and want to put a stop to hackers and bots visiting from certain areas.
All of this can be achieved in the Locations section.
Defender works with a company called MaxMind, so it can have access to the GeoLite2 Database. It’s free to set up an account and will ask you to do so when first setting up location banning.

There are prompts for a free account. From there, they’ll email you steps to set up a password. Once you login in, you click the link for a new license key in Defender’s dashboard.
Create a new license key in MaxMind and then it will be ready to copy and paste into Defender.

Once your new license key is pasted, you’ll be all set once you hit the Download button. It may take a few minutes for the key to register, so keep that in mind.
Now you have the option to Blocklist & Allowlist any country.
There is a drop-down menu that displays them. Once you start typing, it will populate any corresponding countries that start with that letter.

They’ll all appear in the box below your choice of blocklist or allowlist. You can also take them off the list by clicking on the ‘X’ next to the country’s name.

When completed, it’s all saved by hitting the Save Changes button.
Give any locked out hacker a customized message from Defender himself. All of this can be done in the Message area.
You have the ability to add a customized message in this space.

And after that, anyone that is on the blocklist will be greeted by Defender.

After clicking the Save Changes button, the message will be functioning and unwelcome guests will know why they’re IP isn’t making the cut.
If you have a blocklist or allowlist from another website and want to import them, it’s quick and easy to do. Likewise, you can export your list that you have for blocklist and allowlist to use on another website.
All of this is under Import and Export in Defender.

There’s an Import button to import and Export button to export a list.
Importing will not remove existing IPs. Also, when you export, it will include the blocklist and allowlist.
You can view all of your lockouts and quickly ban, allowlist, or delete the list in just a couple of clicks. Plus, you can easily download your activity logs of IP lockouts.
This, unlike the previous sections, is located in Firewall and Logs on Defender’s dashboard.

Once here, you can sort logs by the latest, oldest, or IP address. You can also export them as a CSV and adjust the date range.

Also, take care of the issues in one-click with Bulk Update. You can ban, allowlist, or delete just by checking the boxes individually or by the dropdown to take care of them all.

You can also get more detailed information by clicking on the arrow dropdown next to the issue. There, you’ll also have an option to allowlist or blocklist.
And just like that, all of your lockouts are now taken care of.
Unwanted guests won’t get far with Defender’s custom IP address lockout.
And it’s more than just customized IP address lockout — there’s custom messages, location banning, logs, and much more with Defender.
To learn more tips on using Defender, check out our article about finding & deleting suspicious code and all about how to stop hackers in their tracks.
For more information, check out Defender’s documentation page.