Yay this year is the 7th birthday of our pro WordPress plugin site, Plugin-Planet.com. To celebrate the event, we are giving away 7 free copies of our premium WordPress plugins!
Direct link to article | View post at DigWP.com

Tips, Expertise, Articles and Advice from the Pro's for Your Website or Blog to Succeed

Yay this year is the 7th birthday of our pro WordPress plugin site, Plugin-Planet.com. To celebrate the event, we are giving away 7 free copies of our premium WordPress plugins!
Direct link to article | View post at DigWP.com

Frollo, an Australian banking service provider, has announced its Open Banking Product Data API. New open banking regulations go into effect in Australia on July 1. The goal of Frollo's API is to help data holders comply with new requirements without hassle. Users can leverage the API regardless of who their banking partner is.
GitHub has announced that private repositories with unlimited collaborators will now be free for everyone. Additionally, the company is lowering the cost of its paid plans in order to improve affordability for teams that require advanced features and personalized support.


Do you want to add a navigation menu to your WordPress site?
WordPress comes with a drag and drop menu interface that you can use to create header menus, menus with dropdown options, and more.
In this step by step guide, we will show you how to easily add a navigation menu in WordPress.

A navigation menu is a list of a links pointing to important areas of a website. They are usually presented as a horizontal bar of links at the top of every page on a website.
Navigation menus give your site structure and help visitors find what they’re looking for. Here’s how the navigation menu looks on WPBeginner:

WordPress makes it really easy to add menus and sub-menus. You can add links to your most important pages, categories or topics, blog posts, and even custom links such as your social media profile.
The exact location of your menu will depend on your WordPress theme. Most themes will have several options, so you can create different menus that can be displayed in different places.
For instance, most WordPress themes come with a primary menu that appears on the top. Some themes may include a secondary menu, a footer menu, or a mobile navigation menu as well.
To create a navigation menu, you need to visit the Appearance » Menus page in your WordPress admin dashboard.

First, you need to provide a name for your menu, like ‘Top Navigation Menu’ and then click the ‘Create Menu’ button. This will expand the menu area, and it will look like this:

Next, you can choose the pages you want to add to the menu. You can either automatically add all new top-level pages, or you can select specific pages from the left column.
First, click the ‘View All’ tab to see all your site’s pages. After that click the box next to each of the pages you want to add to your menu, and then click on the ‘Add to Menu’ button.

Once your pages have been added, you can move them around by dragging and dropping them.

Note: All menus have their items listed in a vertical (top to bottom) list in the menu editor. When you put the menu live on your site, it’ll either display vertically or horizontally (left to right), depending on the location you select.
Most themes have several different locations where you can put menus. In this example, we’re using the default 2020 theme, which has 5 different locations.
After adding pages to the menu, select the location where you want to display the menu and click on the ‘Save Menu’ button.

Tip: If you’re not sure where each location is, try saving the menu in different places, then visiting your site to see how it looks. You probably won’t want to use all the locations, but you might want to use more than one.
Here’s our finished menu on the site:

Drop-down menus, sometimes called nested menus, are navigation menus with parent and child menu items. When you run your cursor over a parent item, all the child items will appear beneath it in a sub-menu.
To create a sub menu, drag an item below the parent item, and then drag it slightly to the right. We’ve done that with 3 sub-items beneath ‘Services’ in our menu:

Here’s the sub-menu live on the site:

You can even add multiple layers of dropdown, so that your sub menu can have a sub menu. This can end up looking at bit cluttered, and many themes do not support multi-layer drop-down menus.
In this example, you can see that ‘Logo Design’ (a child item of ‘Services’) has two child items of its own.

If you’re using WordPress to run a blog, then you may want to add your blog categories as a drop-down in your WordPress menu. We do this on WPBeginner:

You can easily add categories to your menu by clicking the Categories tab on the left side of the Menus screen. You may also need to click the ‘View All’ tab to see all your categories.
Simply select the categories you want to add to the menu, and then click the ‘Add to Menu’ button.

The categories will appear as regular menu items at the bottom of your menu. You can drag and drop them into position. We’re going to put all of these categories under the Blog menu item.

Do you want to have a blog page on your site that’s separate from your homepage? If so, check out our tutorial on how to create a separate page for blog posts in WordPress.
Aside from categories and pages, WordPress also makes it super easy to add custom links to your menu. You can use it to link to your social media profiles, your online store, and / or other websites that you own.
You will need to use the ‘Custom Links’ tab on the Menu screen. Simply add the link along with the text you want to use in your menu.

You can even get creative and add social media icons in your menu.

When you add pages or categories to your custom navigation menu, WordPress uses the page title or category name as the link text. You can change this if you want.
Any menu item can be edited by clicking on the downward arrow next to it.

You can change the name of the menu item here. This is also where you can click ‘Remove’ to take the link off your menu altogether.
If you’re struggling with the drag and drop interface, then you can also move the menu item around by clicking the appropriate ‘Move’ link.
You don’t have to just stick to the display locations for your theme. You can add navigation menus in any area that uses widgets, like your sidebar or footer.
Simply go to Appearance » Widgets and add the ‘Navigation Menu’ widget to your sidebar. Next, add a title for the widget and choose the correct menu from the ‘Select Menu’ drop down list.

Here’s an example of a custom WordPress footer menu built on Syed Balkhi website.

If you want to create a truly epic menu with loads of links, we’ve got a tutorial on how to create a mega menu in WordPress. This lets you create a drop-down with lots of items including images.

Mega menus are a great option if you have a large site, like an online store or news site. This type of menu is used by sites like Reuters, Buzzfeed, Starbucks, etc.
We hope this article helped you learn how to add a navigation menu in WordPress. You may also want to check out our guides on how to style navigation menus in WordPress and how to create a sticky floating navigation menu in WordPress.
If you liked this article, then please subscribe to our YouTube Channel for WordPress video tutorials. You can also find us on Twitter and Facebook.
The post How to Add Navigation Menu in WordPress (Beginner’s Guide) appeared first on WPBeginner.
I linked up Water.css not long ago as an interesting sort of CSS framework. No classes. No <h2 class="is-title">. You just use semantic HTML and get styles. Is that going to “scale” very far? Probably not, but it sure is handy for styling things quickly, where — of course — you’re writing semantic HTML but don’t need to care tremendously about the look, other than it should look as decent as it can with low effort.
This week I saw MVP.css making the rounds. Same idea. There are a bunch more!
Even Foundation, while being a big honkin’ framework, does some pretty decent stuff classless-ly™.
The post No-Class CSS Frameworks appeared first on CSS-Tricks.

 Is it possible to build a successful business around WordPress today? The short answer is yes. In 2020 there are millions of freelancers earning a living online – and many of them have businesses they created around WordPress. There are solid reasons for this: WordPress continues to grow as a simple and versatile publishing platform […]
The post How to Start a WordPress Business appeared first on WPExplorer.
With a steadily available supply of COVID-19 global data, it has become equally important that data on a local level is made accessible. Writer Tom Nardi has composed an article outlining five ways to wangle local, granular data.
Think of your logo as your brand ambassador. It’s often the first contact that customers and clients have with your business, and you want it to make a strong first impression. The logo symbolizes your business, and like all symbols, it works hard to communicate your message. When designing your own logo, the first thing […]
The post 5 Must-Try Tips Before Creating Your Own Logo appeared first on designrfix.com.

I was debugging some CSS last week, and I think that post is missing something important: your attitude.
Now – I’m not a very good CSS developer yet. I’ve never written CSS professionally and I don’t understand a lot of basic CSS concepts (I think I finally understood for the first time recently howposition: absoluteworks). And last week I was working on the most complicated CSS project I’d ever attempted.
While I was debugging my CSS, I noticed myself doing some bad things that I normally would not! I was:
• making random changes to my code in the hopes that it would work
• googling a lot of things and trying them without understanding what they did
• if something broke, reverting my changes and starting again
This strategy was exactly as effective as you might imagine (not very effective!), and it was because of my attitude about CSS! I had this unusual-for-me belief that CSS was Too Hard and impossible for me to understand. So let’s talk about that attitude a bit!
It’s super unfortunate this specific bug (a difference in z-index behavior between Chrome and Firefox) is what was giving Julia a hard time. Those kind of cross-browser differences are fewer and farther between these days, thankfully. I’m certainly sympathetic to CSS being super tricky sometimes, and it can be that way without dealing with an actual browser bug.
But I like the sentiment: if you go into a tricky problem with a positive I can do this attitude starting with the basics, you can do it.
I think literally everything in life is easier and better with a better attitude. Food tastes better! Reminds me of my favorite mis-remembered quote from good ol’ Uncle Iroh from The Last Airbender:
The best tasting tea is the tea you drink when you are in a good mood.
Direct Link to Article — Permalink
The post When debugging, your attitude matters appeared first on CSS-Tricks.
Chase McCoy wrote a nifty post about the “gap problem” when making a grid of items. His argument might be summarized like this: how should we space elements with margins in CSS? He notes that the gap property isn’t quite ready for prime time when it comes to using it with flexbox, like this:
.grid {
  display: flex;
  gap: 10px;
}
Right now, using gap with flexbox is only supported in Firefox and I’ve already caught myself forgetting about that in a few projects. So watch out for that.
Anyway, the part about Chase’s blog post that I love is where he mentions Andy Bell’s technique for creating a responsive layout with no media queries, like this:
.grid {
  display: grid;
  grid-gap: 10px;
  grid-template-columns: repeat(auto-fill, minmax(150px, 1fr));
}
This CSS is doing the following:
The nifty thing about all this is that our grid is now effectively responsive because of minmax — if you resize the browser, then the grid will snap down into fewer columns, just like this:
No media queries at all! Although sure, there’s a few other ways that you could get this to work but I think this is neat not just because we’re avoiding media queries — instead, it’s because it teaches us to think in a new way when designing and building components.
Chase continues:
With this technique, instead of using breakpoints to specify the screen size where your items should stack, you specify the minimum size an element should be before it stacks. I like this because it encourages developers to think about responsive design in terms of behaviors instead of screen sizes.
“Behaviors instead of screen sizes” is such a great way to think about component design! A lot of the problems I’ve encountered when making components for a design system is when I’ve been thinking about screen sizes — mobile, tablet, desktop, etc. — and trying to make those components fit within those constraints.

Thinking in behaviors is always more effective because there are so many things that can impact a component beyond what screen or device width we’re working with. Perhaps we want that component to fit inside another component. Or we want to align some helper text to the side of it for comparison.
Either way, thinking about behaviors instead of screen sizes isn’t really going to be fully impossible until we have container queries, as Chris writes:
Container queries are always on the top of the list of requested improvements to CSS. The general sentiment is that if we had container queries, we wouldn’t write as many global media queries based on page size. That’s because we’re actually trying to control a more scoped container, and the only reason we use media queries for that now is because it’s the best tool we have in CSS. I absolutely believe that.
The post Thinking in Behaviors, Not Screen Sizes appeared first on CSS-Tricks.
Foldable phones are starting to be a thing. Early days, for sure, but some are already shipping, and they definitely have web browsers on them. Stands to reason that, as web designers, we are going to want to know where that fold is so we can design screens that fit onto the top half and bottom half… or left half and right half¹.
Looks like that’s going to make its way to us in the form of env() constants, just like all that notch stuff.
The code block in the polyfill repo is:
@media (spanning: single-fold-vertical) {
  body {
    flex-direction: row;
  }
  .map {
    flex: 1 1 env(fold-left)
  }
  .locations-list {
    flex: 1;
  }
}
I would also think it could be…
@media (spanning: single-fold-vertical) {
  .page-wrap {
    display: grid;
    grid-template-columns: env(fold-left) 1fr;
  }
}
Interesting how there is no fold-right, isn’t it? And aren’t we trying to stay away from directional terms like that and use logical properties? Why not fold-inline-start?

The post CSS Foldable Display Polyfill appeared first on CSS-Tricks.
WordPress comes with some pretty neat tools to manage and edit images. You can easily upload images, align them, and even edit them inside WordPress.
Most beginners are not aware of these WordPress image editing features. It takes users a while to discover out some of them while other features go completely unnoticed.
If you ever had a question about WordPress images, then you’re in luck. In this article, we will cover the most common image issues in WordPress and how to fix them.

Since this is a detailed article, here is the list of image related issues that we will cover this article.
Let’s start with the most obvious one.
WordPress makes it super easy to upload images to your posts, pages, and non-content areas like sidebars.
To upload images in WordPress posts and pages, you simply need to add the image block to the content editor.

You can also add the image block by simply typing /image in a paragraph block. The editor will start showing blocks you can insert as soon as you start typing.

WordPress will now add the image block to the editor. You need to click on the ‘Upload’ button to select and upload the image from your computer.

You can also select a previously uploaded image from your media library.
After uploading the image, you’ll see a live preview of the image in the content editor.

You’ll see a bunch of image settings on the right panel. From there you can provide image alt text, select image size, and image style.
WordPress makes it easier to align images to the left, right, or center. Simply select the image by clicking on it, and then click on alignment button from the block toolbar.

You may have noticed how some popular blogs use images with text wrapped around them. This is done by using the align feature.

Alternatively, you can also use the ‘Media & Text’ block instead of the image block. This block is made specifically for adding images next to the text.

You can then upload an image and text side by side. You can also use the block toolbar to change the image or text side.

WordPress allows you to easily add caption for images. After you upload an image, you’ll see the option to add caption right below the image preview.

Similarly, you can also add captions to image galleries in WordPress. For more details, see our guide on how to add captions to images in WordPress.
Often users ask us how to neatly display photos in columns and rows.
Let’s say you want to share photos of a birthday party or vacation photos. You can add them one by one into a post, but this will look like a lengthy list of images.
The better way to group your photos is by creating image galleries.
WordPress comes with a built-in gallery block that allows you to easily add images in rows and columns with thumbnail previews.
Simply add the gallery block to the post editor and select the images you want to upload.

For more detailed instructions see our guide on how to create an image gallery in WordPress.

You will notice that the default WordPress image galleries lack several features. For instance, they are also not very easy to browse.
If you often upload images and photographs to your WordPress site, then you will need a proper WordPress photo gallery plugin.
We recommend using Envira Gallery. It allows you to easily create beautiful and fully mobile-friendly image galleries on your WordPress site.
The best part is that it adds additional functionality like albums, gallery templates, social sharing, slideshows, watermarking, pagination, password protection, tagging, fullscreen view, and much more.
Most WordPress themes allow you to prominently display a featured image with your articles. Here is how to set a featured image in WordPress to avoid missing thumbnails.

Now, you can click on ‘Set Featured Image’ to upload your post thumbnail. After uploading the image, you’ll be able to see your post thumbnail in the featured image meta box like this:

For more details, see our guide on how to add featured image or post thumbnail in WordPress.
Cover images are the wide or full-width images that can be used as a separator between different sections of an article or a lengthy sales page.
They are highly engaging and help users easily scan a page without feeling overwhelmed by too much text.
To add a cover image, you simply need to add the ‘Cover’ block to the content editor.

Next, you need to upload the image you want to use from your computer or select one from the media library. If you don’t want to use an image, then you can also select a color background as the cover.
Tip: It is best to use a large image for a better result.
You’ll now see a liver preview of your cover image in the editor. You can change the cover image display options from the block toolbar or using the settings on the right.

To learn more see our guide on the difference between cover image vs featured image in WordPress and how to use them effectively.
Inserting the featured image inside content is a common mistake made by beginners.
Once you set a featured image, you don’t need to insert it into the post editor along with your post content.
Doing so, will make your featured image appear twice. Once as the featured image, and once as an image inside the post.

You can add other images in your post, but your featured image goes in the featured image box.
For more details, see our guide on how to fix featured image appearing twice in WordPress posts.
When you are uploading images from your phone or camera they are usually too big.
WordPress automatically creates small, medium, and large image sizes for your original upload. But sometimes you may need to crop the image in a different size.
WordPress is no Photoshop, but it comes with some basic image editing features like scale, crop, flip and rotate images.
Go to Media » Add New and upload your image. After uploading the image, you will see an Edit link next to the uploaded image.
Clicking on it will open the Edit Media screen where you will see an Edit Image button right below the image. This will open the WordPress image editor.

From here you can click on the ‘Edit Image’ button below the image preview. This will open the image editing screen.
On the image editor screen, you will see buttons to perform some basic image editing tasks such as cropping, rotating, resizing, etc.

For more detailed instructions see our guide on how to crop, rotate, scale, and flip images in WordPress.
A header image in WordPress is a theme feature. Many WordPress free and premium themes comes with support for header image.
You can upload your own custom header image from the Appearance » Customize page.

Since it is a theme feature, many WordPress themes come with their own header options. Some allow you to set a site-wide header image, while others allow you to only set a header image for the homepage.
Just like the custom header image, custom background image is also a WordPress theme feature. Many WordPress themes come with support for custom background images.
Visit Appearance » Customize to launch the theme customizer. If you can see the Background Image option, then your theme has support for custom backgrounds.

It is a theme feature which is why it varies from one theme to another. Depending on your theme you’ll see different options for styling your background image.
If your theme does not support background image, then you can still use a plugin to add full-screen background images to your website.

Images can make your articles stand out. However, you must respect copyrights of other people and try to find images that you are legally allowed to use.
We are often asked by our readers about how to find best royalty free images to use in their posts?
There are many websites where you can find free images to use. However, you will soon notice that images on those sites look overused and generic.
See our list of the best sources for free public domain and CC0-licensed images on the internet.
If you run a photography blog, then you will notice that WordPress does not allow you to sort photos and images.
Wouldn’t it be great if you could add tags to your images, so that you and your users can easily browse them?
Luckily, there are some great plugins that allow you to do just that.
For a photography related blog, the best option is to use Envira Gallery which comes with an add-on to add tags.
Envira Gallery allows you to create beautiful, mobile-ready, photo galleries in WordPress. Using tags, your users can easily filter and sort photos without even reloading a page.

For more details, see our article on how to add categories and tags to WordPress media library.
This question often comes up when you are migrating your site to WordPress. Some images on your website may still be pointing to older location.
Specially users importing blogs from Blogger, Squarespace, or WordPress.com may face this problem.
While the images on your site may appear correctly, they are still loading from external source. To solve this issue, all you need to do is install and activate Auto Upload Images plugin.

The plugin will check for external images once you update or save any post or page. You can manually do that for each post or page or you can bulk edit all posts and simply click the update button.
For detailed instructions, see our guide on how to import external images in WordPress.
When running a multi-author site in WordPress, some of your authors may not be familiar with the featured image functionality.
In this case, you may want to remind yourself or your users to upload a featured image whenever they are submitting a post in WordPress.
You can do this by installing and activating the Require Featured Image plugin.
Once activated, the plugin will display a notification box in the post edit area, informing users that this post requires a featured image.

You and your users will be able to save posts as drafts, but you cannot publish the post until you add a featured image.
See our article on how to require featured images for posts in WordPress for more instructions.
Finding the perfect featured image for every post or article is a tough task. Sometimes you may not want to add a featured image to a post, but your theme may look awkward without a featured image.
This is where a default featured image can come in handy. A default featured image is used when an article does not have a featured image of its own.
You can set a default featured image by using the default featured image plugin.

We hope this article helped you fix some of the most common image issues in WordPress. You may also want to see our list of the most common WordPress errors and how to fix them.
If you liked this article, then please subscribe to our YouTube Channel for WordPress video tutorials. You can also find us on Twitter and Facebook.
The post How to Fix Common Image Issues in WordPress appeared first on WPBeginner.

John is a public relations professional and he is often required you to send press releases and event invites to journalists, bloggers and influencers via email.
Reaching out to individual journalists can be slow so how do you send the same email to multiple people in one go? Some people use the BCC option in Gmail - compose a single email, put email addresses of all recipients in the BCC field and hit send.
That’s obviously the easiest option for sending bulk emails through Gmail but such generic email pitches are unlikely to get noticed.
In this tutorial, I’ll show you how you can use send personalised email pitches to your media contacts through Gmail and Google Sheets. You’ll be able to schedule your press releases in advance and also track which influencers have seen your emails.
The big advantage is that, unlike other mass email programs, messages sent via Mail merge are delivered just like regular emails directly in the Inbox.
Let’s get started:
Go to the Google Workspace Marketplace and install the Gmail Mail Merge addon. You’ll need to grant certain permissions so that the add-on can send emails from your Gmail accounts. It also needs permission to attach files from your Google Drive.
Now that the add-on is installed, type sheets.new in your browser to create a new Google Sheet. Inside the sheet, go to the Addons menu, choose “Mail Merge with Attachments” and then select the “Create Merge Template” menu.

Your sheet now has all the essential columns that are required for running mail merge but can add more columns. We’ll add Location and News Outlet columns as shown in the above screenshot.
The next task is to get the media list into this Google Sheet. You can either import groups from Google Contacts, from your Mailchimp campaigns or, if you are an Excel user, export as CSV and directly import the CSV file into Google Sheets.
Open your Gmail, create a new email message (see screenshot) and save the template in your drafts folder. The email can have {{markers}} enclosed in double curly braces and these are replaced with actual values from the Google Sheet in your outgoing emails.
When we enclose some text inside double curly braces, it becomes a marker and these are replaced with values in the sheet. You can also add emojis in the subject and body.
Next, we can add some attachments to our email template. You can either upload files from your computer or you can bring directly from your Google Drive.

Now that our email template in Gmail is ready, go back to your Google Sheet and choose Configure mail merge from the Mail Merge menu under add-ons.menu.
Follow the step by step wizard to configure merge but there are a few important things you should know.

After the configuration is done, go to the Send Email Section, select the Send a test email option and hit the Go button.
Mail Merge will take the merge data from the first row in the Google Sheet and send you a test email. You can find the test email in your Gmail Sent folder.
If you are satisfied with the test email, go back to the Google Sheet, select the Run Mail Merge option and hit Go to perform a live merge. That’s it.
The emails will be dispatched immediately and you can check the Mail Merge Status column in the sheet to track the sending progress.
You can add more rows in the Google Sheet to send the same email to another batch of people and when you hit send, Mail Merge will automatically ignore the rows that have already been sent the email.
This report made a big splash last year. It’s a large chunk of research that shows just how terribly the web does with accessibility. It’s been updated this year and (drumroll…) we got a little worse. I’ll use their blockquote:
The number of errors increased 2.1% between February 2019 and February 2020.
From the choir:
Part of me thinks: it’s time for browsers to step up and auto-fix the things they can. But I also think that’s dangerous territory. AMP is a browser vendor’s version of “enough is enough” with poor web performance and I’m not loving how that’s turned out to date. That said, evangelism doesn’t seem to be working.
You can fix your site though. My favorite tool is axe.
Direct Link to Article — Permalink
The post The WebAIM Million—Updated appeared first on CSS-Tricks.
When building out a WordPress website, it’s vital to have all the right tools on hand. And to get eyeballs on your content, that means building out a solid SEO strategy. A relatively hands-off way to accomplish this is through the use of SEO plugins. Luckily, there are quite a few plugins available for WordPress that make optimizing your site for SEO super easy.
Let’s take a look at some of these SEO plugins for WordPress then dive into discussing a few other tools that can take the guesswork out of selecting keywords and tracking results.
Sign up for Envato Elements and get unlimited downloads starting at only $16.50 per month!

First on our list is Yoast SEO. This WordPress plugin is one of the most popular, for good reason. It acts as a one-stop shop for on-page SEO. Once installed, it automatically adds widgets to each post and page you can use to add SEO titles, descriptions, assign keywords, as well as other items. You can also use it to add Open Graph metadata. Additionally, you can use it to add social media images to each post along with titles and descriptions optimized for social media platforms. Lastly, Yoast creates an XML sitemap for you and can be used for managing SEO redirects. Both a free and premium version of the plugin are available.
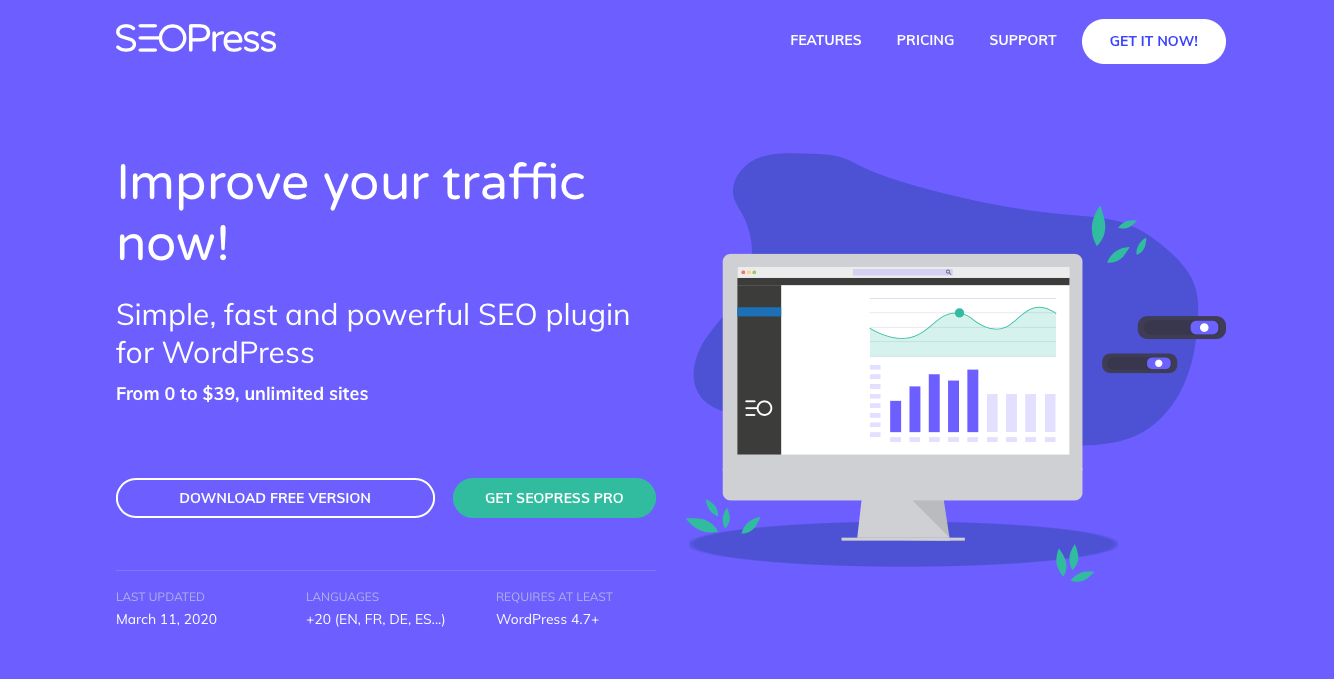
Another great option is SEOPress. This plugin covers many of the same attributes as Yoast by adding fields for customizing a post or page’s meta title, description, social media content, redirects, and XML sitemaps. It’s interface is a bit easier to navigate, however, while still offering a wider range of options for experienced developers. This plugin is available in a free and premium version as well.
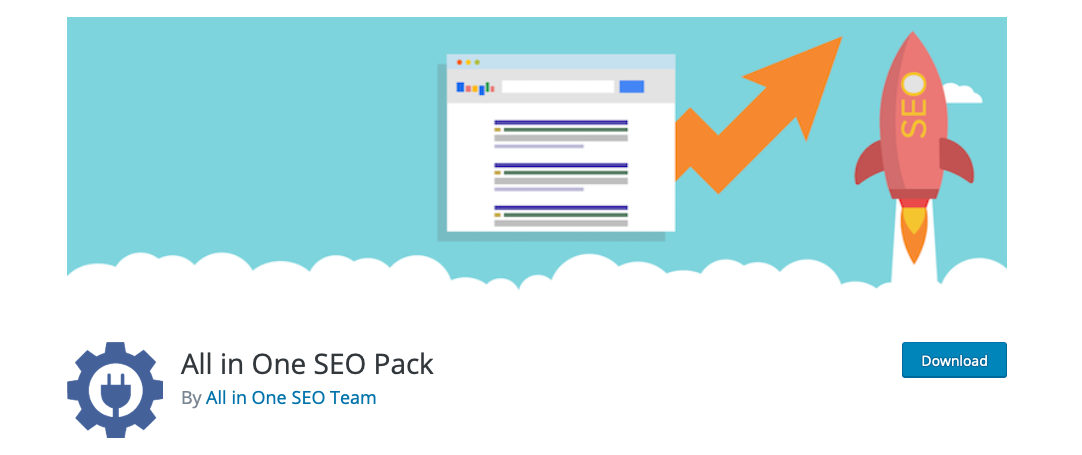
Still another popular option is the All in One SEO Pack. This SEO plugin for WordPress includes a full set of tools you can implement immediately on your website. Customize meta titles and descriptions; set up an XML sitemap, create image sitemaps, and more. It’s also compatible with WooCommerce. As you might expect, the premium version of this plugin comes with additional features and allows for a greater level of control over your site’s optimization efforts.
![]()
The last of the plugins we’ll be discussing here is Rank Math. This WordPress SEO plugin is super easy to use and makes it easy to optimize your posts and pages for search engines and for social media. Use the provided setup wizard to import information from other SEO plugins or manually customize meta titles, descriptions, and images. Use it to create Open Graph metadata, an XML sitemap, integrate with Google Search Console and more.
Though the primary focus here is SEO plugins for WordPress, we’d be remiss if we didn’t at least mention a few other tools that make building a comprehensive SEO strategy easier.
In case you didn’t know, having an SEO strategy is imperative for any site’s success. Sure, some happen upon it accidentally, but most keep a mindful eye on keywords and rankings. And you can take a lot of the legwork out of this effort by using a WordPress SEO plugin and by utilizing some of the research and monitoring tools listed here. The results will be well worth the price of admission, so to speak.
